Monday, May 25, 2020

Completing Taping-off the Nonskid Surfaces and Over-drilling & Filling for the Bow Cleat Fasteners


May 25, 2020


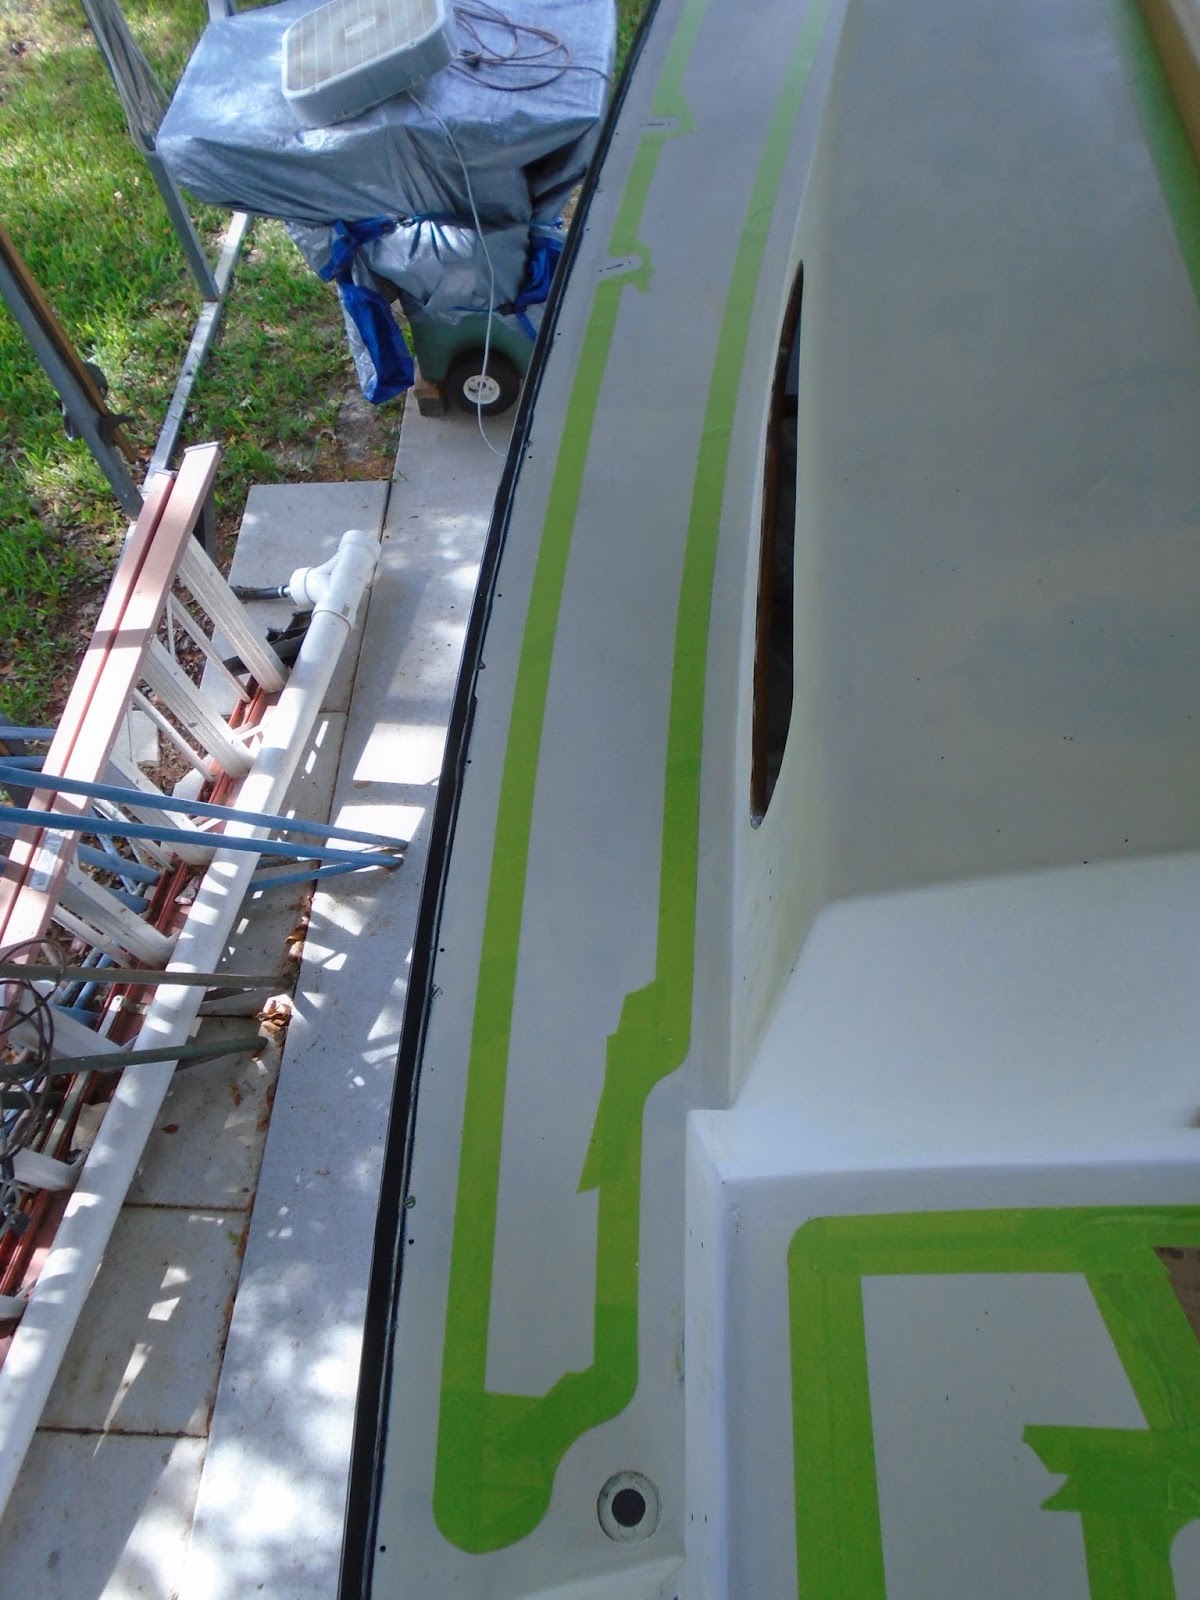
With a fairly reasonable goal of having the exterior finish paint wrapped up by next weekend (fairly reasonable), I set out today to complete the taping-off of the nonskid surfaces.  So after wrapping up a few domestic items, I finally made my way over to the Allied 24 by early afternoon.  I got started immediately on the port side of the coachroof, needing to complete the tape lines around the port companionway rail for the slide hatch, and then carry things forward on the cabin top.


I repeated the dimensions for the outline of the nonskid (~1.5" from deck fittings, etc.).  I worked my way up to just shy of the leading edge of the forward hatch, then back aft around the mast step.


I also marked a foot pad on the leading edge of the coachroof itself, and with that I completed the nonskid surfacing - with the exception of the cockpit sole, which would come just before applying the nonskid paint.


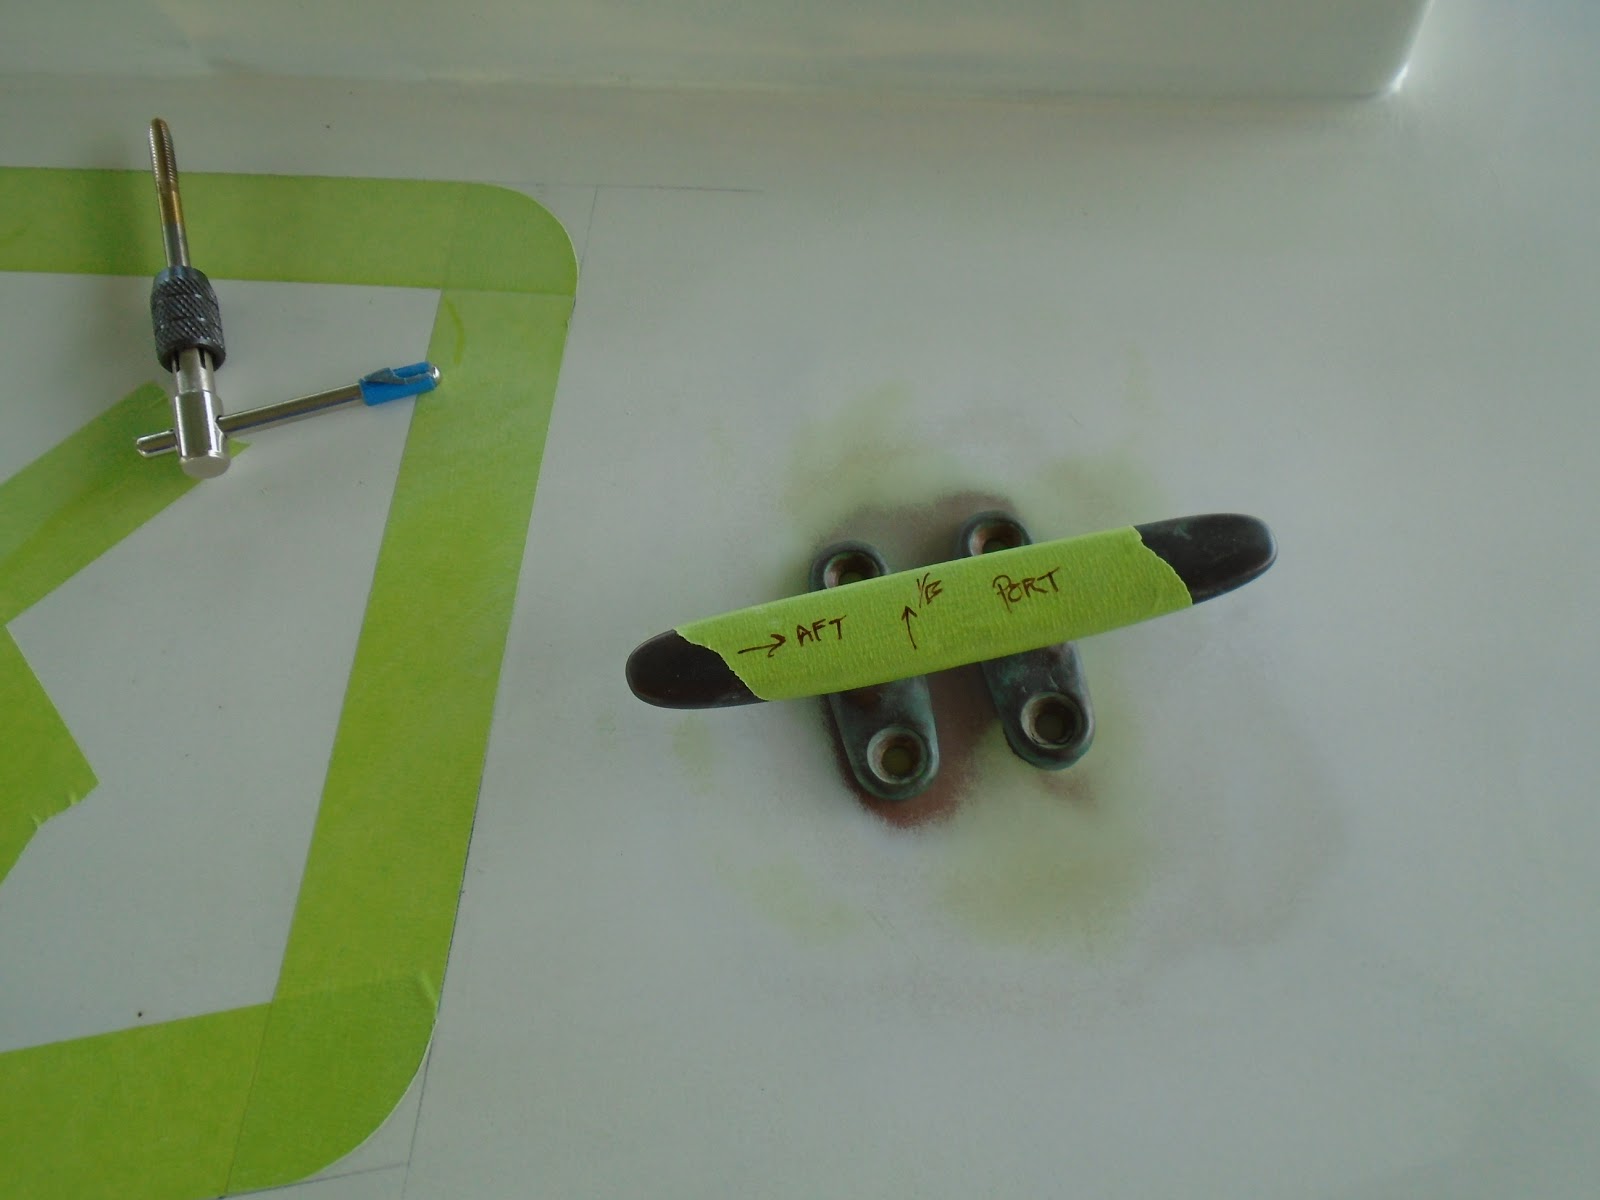
Having completed the nonskid tape lines, I turned my attention to the bow cleat.  Previous owner(s) had not maintained this deck fitting, and at some point water made its way into the core, which was not sealed off from the fastener holes, and eventually rotted out a large portion of the foredeck.  An attempted fix for this, again by a previous owner(s), was to screw a piece of plywood to the underside of the damaged area and then fiberglass over the plywood, and a poor attempt at fairing the "repair" in to the surrounding surfaces.  By the time the current owner purchased her, the foredeck was beginning to fail again.  She now has a fresh section of balsa core material, with layers of 1708 biaxial fiberglass top and bottom.  To prevent future issues with the damaging effects of water ingress, and like I have done for the other deck penetrations, I needed to over-drill the holes, fill with thickened epoxy, and then drill and tap for machine screws.  First step, figuring where the cleat would be installed.


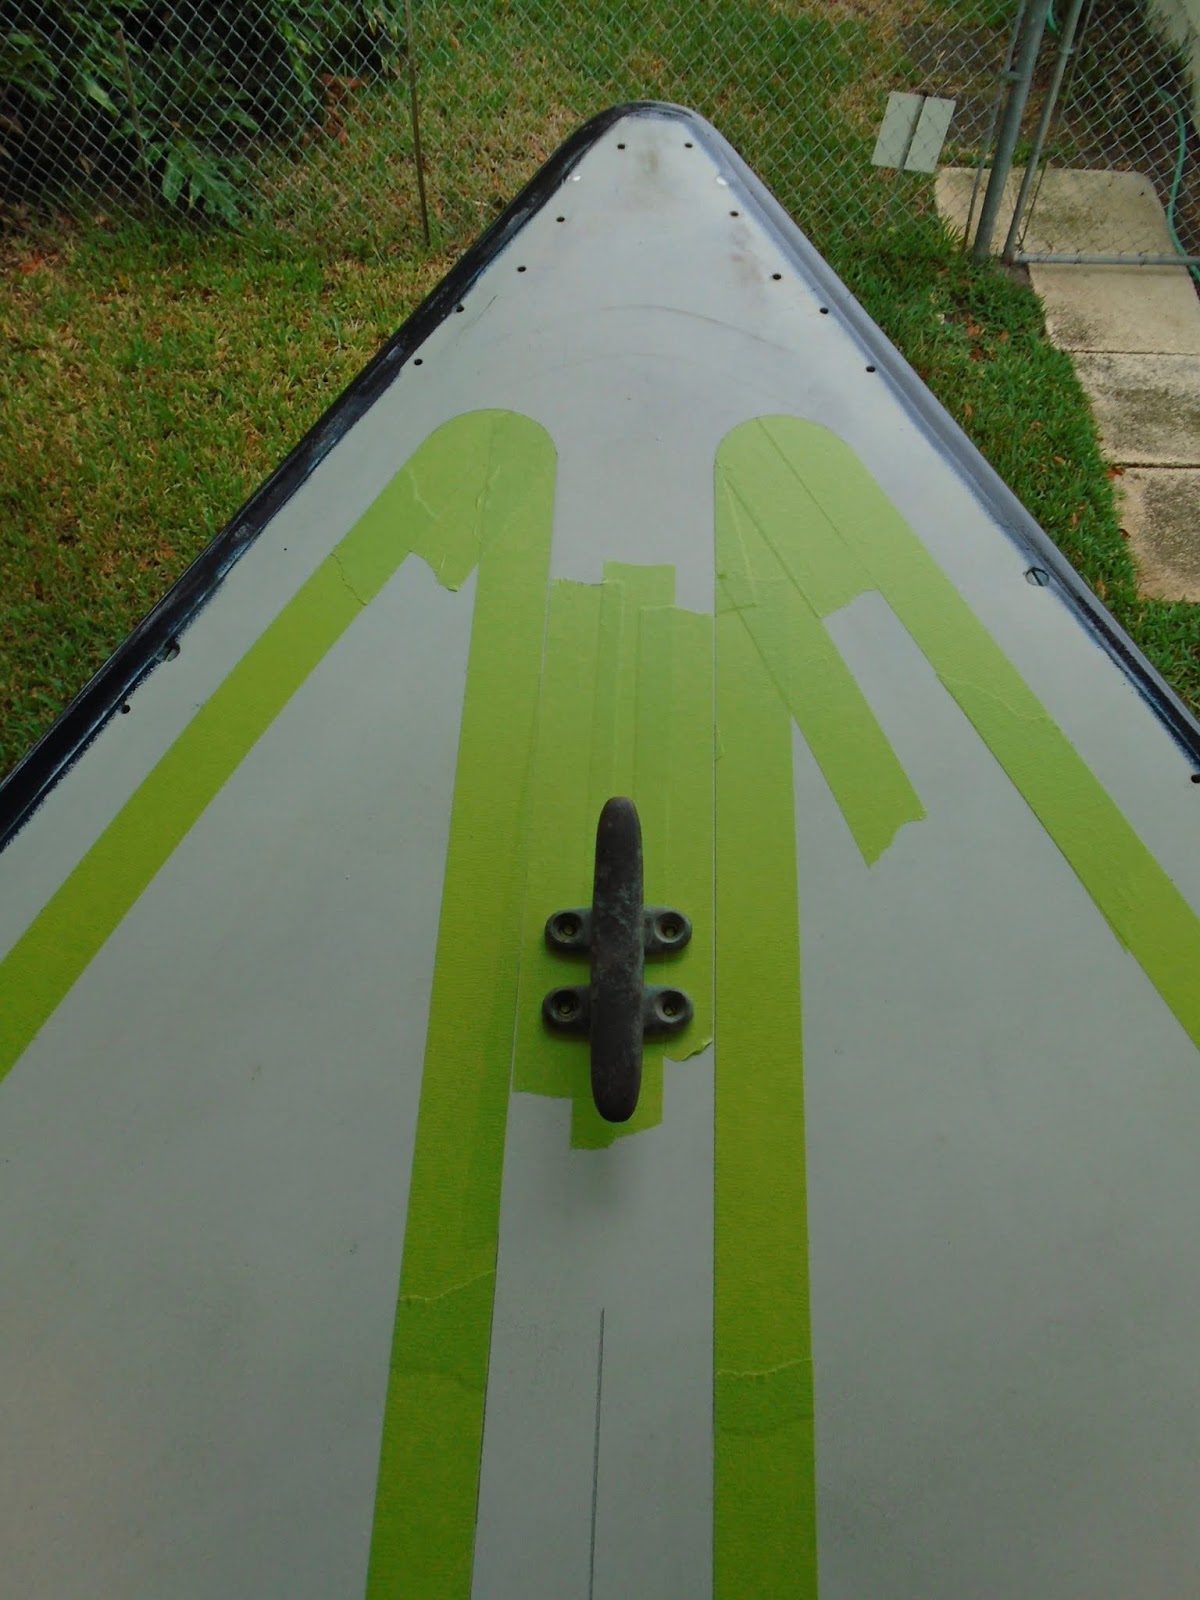
Satisfied with the location of the cleat, I applied some tape to the deck surface, and marked for the four fasteners.  I then drilled each hole with a 1/2" forstner bit, through the top skin and balsa core, stopping at the bottom skin.


I cleaned out the holes with a good acetone wash, wetted them out with epoxy resin, and then filled them to just shy of the rim with thickened epoxy.  At this point, I wanted to allow the epoxy to begin to kick and cure a bit before applying the skim coat of fairing compound.  So to that end, I began uninstalling the brightwork that I had mounted on the boat (primarily the companionway trim, rails, and hatch), including the hatches.


Once I had completed the removal of the brightwork, I mixed the two-part epoxy fairing material to form a paste, to which I then applied over the over-drilled holes.  Since I wanted to keep the tape covered from the sun's intensity, I applied a sheet of plastic over the work area to protect the tarp. 


Once again naked, but ready for paint.


Total Time Today: 2.75 hrs

Sunday, May 24, 2020

Finishing Installation Prep for Aft Deck Cleats & Continued Taping-off for the Nonskid Surfaces


May 24, 2020


I picked up this afternoon where I had left off the previous day, which was working on the aft deck cleats and the nonskid surfaces.  In the previous work session, I had marked for location and over-drilled and filled for the fasteners to secure the aft deck cleats.  I sanded the thickened epoxy down to a relatively fair surface.


I started on the starboard side, and then repeated the effort for the port side cleat.  I purposefully to the surface area of the filled over-drill areas to slightly concave as compared to the balance of the deck, knowing that I would finish off the prep with a skim coat of the TotalBoat TotalFair 2-part epoxy based fairing compound.


After thoroughly cleaning the deck surfaces, I mixed the two-part system and applied the fairing compound - starting on the starboard side.


I cleaned the surfaces on the port side and then applied the fairing compound.  This particular two-part fairing compound is able to be sanded within hours of application, so knowing this I turned to the nonskid surface prep and would come back to this task towards the end of the work session.


I picked things back up on the port side of the boat, as it related to defining the nonskid surfaces.  I began taping-off just forward of the port side coaming cubby, and moved forward from there.


The detail work on the side decks were the chain plates, and got creative on the use of a carpenter's pencil sharpener to achieve the radius that provided the best aesthetic. 


I worked my way to the bow, and laid out the foredeck nonskid.  The basic design was a bifurcated port and starboard area of nonskid, offering balance, with a centerline area of glossy finish paint to include the bow cleat.


I then continued down the starboard side deck, again, taking time with the detail work around the chainplates.


I finished the decks with completing the starboard side deck just forward of the coaming cubby.


With the side decks completed, I moved up to the coachroof, on the starboard side.  I used the same dimension reference of ~1.5" around the perimeter of structures and boundaries, but ran out of tape as I was about ready to make the turn on the port side companionway. 


There is just a bit more nonskid surface layout remaining before turning to the application of the Alexseal topcoat paint for the deck / cockpit / and coachroof.


The two-part epoxy-based fairing compound was now ready for sanding, and so I brought the 5" orbital sander out with 180-grit discs to take the surface down to final fair. I started this time on the port side, and using the sander brought the surfaces fair to the surrounding deck surface.


Next, I set the port aft deck cleat in position and marked for drilling.  


I selected the bit in order to drill and tap for 1/4" machine screws.  I started with one of the four fasteners: drilled, tapped, and installed the machine screw with the cleat in place.  I then moved to the opposite corner, and repeated those steps for that fastener.  Again with the cleat in place, I completed the balance of the fasteners.  This order of process ensured that the location for each fasteners was perfectly aligned with the cleat itself.


The port side completed, ready for a coat of primer.


I repeated the process that I outlined on the port side for the starboard cleat.  Prior to the deck paint, I have a couple tasks left: repeating this aft deck cleat process for the foredeck cleat, and then priming these work areas.  


Total Time Today: 4.75 hrs

Saturday, May 23, 2020

Aft Deck Cleats and Taping-off the Nonskid Surfaces


May 23, 2020


It was time to get the deck and cockpit painting started, well at least the prep for it.  I began by laying out the location of the aft deck cleats.  I decided to move them a bit further aft from where they were originally installed, and I also put them on an angle, which followed the outboard edge of the deck/hull/toe rail.  I applied tape to the deck to capture the location of the cleat itself, specifically the location of the fasteners. 


With the Aft cleats' locations established, I then turned to the nonskid surfaces for the aft deck and worked my way forward.  I would come back later in the day to over-drill the aft deck cleat fastener holes and fill them with thickened epoxy.  


The previous paint scheme held no nonskid for the aft deck, so I thought a safer layout would include at least a place to plant one foot on the poop deck.  I marked a modest  15" by 12" pattern (more trapezoid than rectangular, rounded the corners and removed the excess with a razor knife.


I repeated the same steps and process for the starboard side of the aft deck.


With the aft deck layout complete, I began to move forward by working on the side deck aft of the coaming cubby holes.  I generally pulled the nonskid borders in by 1.5", and rounded the intersecting lines, as well as deck fittings like drains.  From here, I moved into the cockpit seating and around to the bridge deck.  I did get to the cockpit floor given the need to epoxy-fill the over-drilled fastener holes for the aft deck cleats.  I finished this task, and then applied a skim coat of fairing compound over the over-drilled holes.


A closeup of the aft deck layout.


Total Time Today: 3.75 hrs

Friday, May 22, 2020

Lazarette Hatch & V-berth Floor Trim


May 22, 2020


I had a number of extracurricular activities going on today, so my time on the Allied 24 was limited to roughly two hours.  I started by water-washing the skim coat of fairing compound I had applied the day earlier.  Once I had dried the surface, I sanded the deck to fair, and then cleaned the surface with a solvent wash.


I set the lazarette hatch in place and marked for the fasteners.  Once pre-drilled, I tapped for #10-24 machine screws.


The two hinges would require four fasteners per hinge.


After tapping the fastener holes, I installed the hatch to test fit - all good. I then mixed a small pot of Intrlux Primekote (two-part epoxy-based primer), and applied it to the prepared surface.


I had enough time to grab the V-berth floor trim and install it.  Interior trim nearly finished!  We have some additional work on the landing platform, specifically, a method to secure the companionway drop boards while the vessel is in use.


Total Time Today: 1.5 hrs

Thursday, May 21, 2020

Lazarette Hatch, Cabin Deadlight Trim, and V-berth Floor Trim


May 21, 2020


A managed to escape the home office in the late afternoon for a couple hours work on the Allied 24.  I picked up where I last left off with continued work on changing out the lazarette hatch hinges, which required filling the old fasteners holes, and marking then over-drilling and filling with thickened epoxy the new fastener holes.  I applied a skim coat of fairing compound today, which I will need to sand fair tomorrow and continue on to tapping the holes for the new fasteners.


I left the poop deck and moved onto the cabin deadlight openings.  The cabin sides are too narrow for the straight installation of the deadlights, and so require a trim ring on the interior to provide enough depth for the install.  Today, I fine-tuned the openings to accept the deadlights.


The fine-tuning involved sanding a bit here and a bit there until the fit was snug.


Happy with the snug fit, I wiped down the trim rings with an acetone wash, and then mixed a small amount of resin.


I applied the epoxy resin on the surfaces of the trim rings to seal them from any potential damage from water intrusion.


Having but a little time today, I moved on to the last piece of interior trim (I think!), which was on the aft edge of the v-berth floor.  I took a measure of the span, grabbed a piece of teak stock, and headed over to the table saw.  I removed a section of the teak stock so that the trim would sit flush on the v-berth floor.


Happy with the fit, I eased the edges and surfaces by sanding through 180-grit paper, pre-drilled for three #8 wood screws, and then dry-fitted the trim piece.


Final step this evening was to apply teak oil to the v-berth floor trim piece - installation tomorrow.


Total Time Today: 2 hrs


Sunday, May 17, 2020

Hatch Work, Interior Trim, and 12V Battery Install


MY 17, 2020


Getting ever closer to the point of having all of the brightwork and deck hardware dry-fitted for the application of the finish paint, I pushed on today with the lazaretto hatch.  I need to change out the hinges securing the hatch, and so over the last couple days worked to remove and repair the structure to accomplish this task.  Today, I set the hatch in place, applied tape in order to place and align the hinges, marking for drilling for fasteners.


On the poop deck, I over-drilled the locations for the #10 fasteners with a 1/2" forstner bit.


I then cleaned the surfaces with acetone, wet the holes with resin, and then filled with thickened epoxy (West System 406 colloidal silica).


Taking care of other items while the thickened epoxy set up, I later came back and applied TotalBoat TotalFair, epoxy-based fairing compound.  I would sand these areas fair in the coming day, and just prior to tapping for the #10 machine screws.


Back in the shop, I tapped the lazarette hatch for the #10 machine screws.


And then installed the hinges onto the lazarette hatch.  I set the hatch to the side, and focused on other items.


In the boat I needed to address the base of the battery tray for the 12V lithium ion battery.  I wanted to install a rubber base to dampen vibration as well as help to provide a friction surface to keep the battery from moving around in seas.  The solution was to epoxy-glue a couple 11"-long rubber pads to the bottom of the tray.  To this end, I cleaned the surface of the battery tray with acetone, and then applied epoxy resin to wet it out.  I then thickened the remaining resin with 406 colloidal silica, and placed the pads in position.


I went ahead and set the battery in place - it's weight would serve to achieve a good surface bond between the rubber pads and the battery tray.  Finally, I secured the battery with a strap.


Once again back in the shop, I pulled the landing platform trim and installed them with #8 wood screws finished with cup washers.


I carried the landing platform over to the boat and set it in place.  The oiled teak provided a nice contrast to the interior finish paint.


Total Time Today: 4 hrs

July 29, 2020 The day had arrived!  Time to apply the name of the vessel...S/V Sea Hagg, hailing out of Key Largo (there's on...