Sunday, July 14, 2019

Sanding & Fairing the Stern and Painting the Cockpit Lockers


July 14, 2019


I had errands to run in the middle part of the day, so getting back on the Allied 24 would come around 3:30 in the afternoon.  Nevertheless, the pace of work was brisk when I was free to begin the work.  I started on the stern of the boat - the work I did in yesterday's session on the interior of the lazarette and the stern, both areas related to the aft chainplate.

I removed the peel ply from the surface of the now permanently glued on "backing plate" for the aft chainplate, as well as the two small pieces of 1708 fiberglass I laid over two sets of 4 fastener holes on the stern's port side.  Despite applying the peel ply to eliminate the need for sanding prior to further work, I still had a few areas to water-wash and sand.  Also, there was a bit of fiberglass overhanging the backing plate - seen below.  This fiberglass is the single layer of 1708 I laid over the length of the backing plate.  I removed the overhang with an oscillating tool, and followed that up with sanding the areas requiring it with a 1" belt sander, as well as by hand.


The backing plate is ready for the new aft chainplate.


These two patches will eventually be painted over, and will blend in to the balance of the lazarette surface.


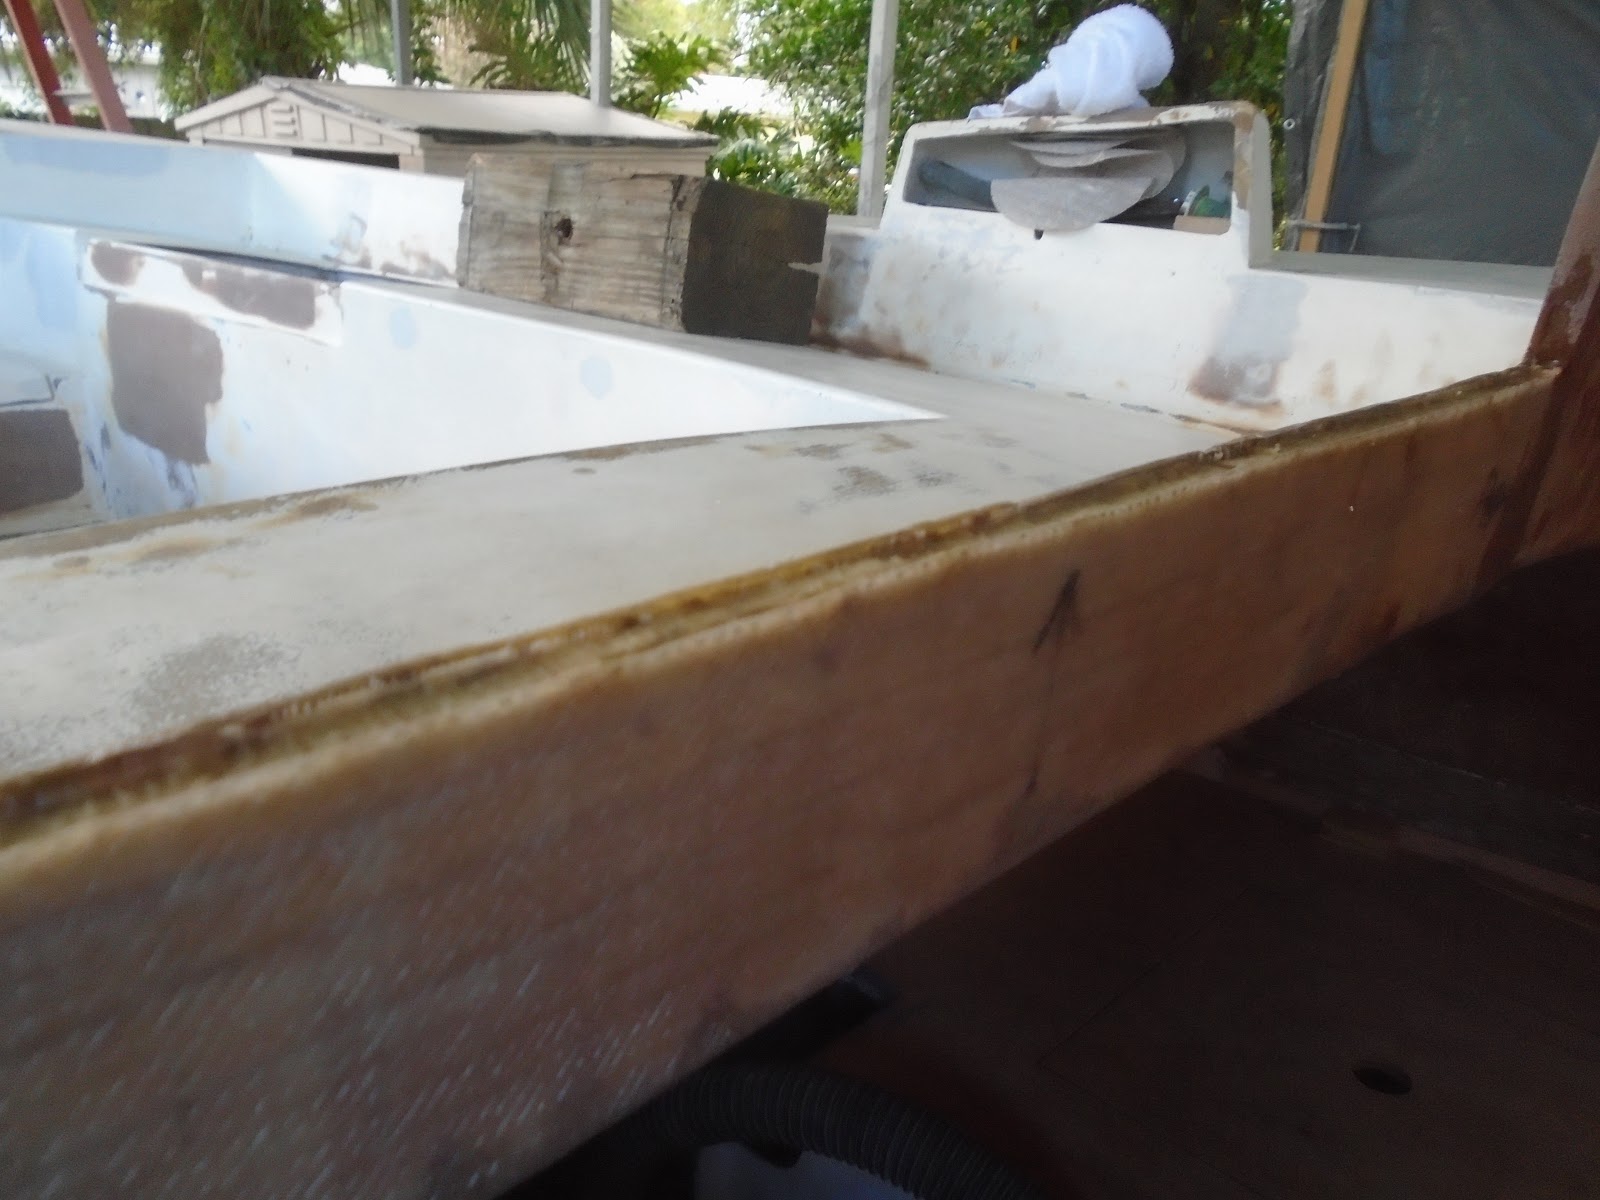
With the work finished in the lazarette, for now, I moved to the exterior of the boat.  When I started on the boat this afternoon my first order of business was to water-wash the previous work session's epoxy work - areas not covered with peel ply.  That being done, I was ready to begin sanding the fairing compound I placed onto the stern.  The picture below is post-sanding 


There was still a few pinholes and low spots that required a bit more fairing compound, but that would wait until the end of the work day.


What I did in the meantime was to address the long overdue painting of the cockpit lockers.  I again vacuumed the surfaces within the large space beneath the cockpit well: interior vertical surfaces of the cockpit well, the hull, as well as the lazarette bulkhead and the bulkhead placed athwartship in the middle of the cockpit well.  I then solvent-washed those surfaces multiple times to remove as much of the last 50+ years of whatever.


I mixed roughly 28 ounces of the gray TotalBoat TotalProtect, grabbed the painting tools I would need, and headed over to the boat.  I used a 4" small nap roller and a 3" brush for the tight spots.  In all, I put three coats of the epoxy-based paint on the interior surfaces of the cockpit lockers. 


The remaining portion of the interior of the boat requiring this touch epoxy-based locker/bilge paint is the lazarette and the areas in the cabin settee lockers where the new seacocks will be installed.


With the painting completed, I collected what was to be placed back in the shop and what was to be sent to the rubbish bin.  Back in the shop, I mixed a small pot of epoxy and thickened it with the 406 colloidal silica and 407 low-density fairing compound, as per usual, and headed back to the stern of the Allied 24.  I solvent-washed the area thoroughly, and then spread another skim coat on with a large plastic squeegee.  That would complete the work for the day.


Total Time Today: 2.75 hrs

Saturday, July 13, 2019

Surface Repairs to the Stern and Misc. Sanding


July 13, 2019


Getting back on the boat today I was eager to begin painting, but managed to somehow yet again delay that task.  There s plenty to paint (I'm referring to interior surfaces here), and I just need to focus solely on painting in the work session instead of the many smaller tasks that still need to be done.  I, however, did get straight into the sanding work.  I began the sanding rounds in the cockpit well, first working the old ice box repair.  After the sanding, I noticed two very small and very shallow low spots.


Next, I sanded the aft portion of the cockpit well.  This surface is now ready for primer paint.


I moved into the boat to sand the mast support beam.  In the previous work session I applied one final layer of 1708 biaxial cloth to the mast support beam in between the primary bulkheads. I had applied a layer of peel ply on top of the fiberglass, so sanding was kept to a minimum.


The forward portion of the boat (v-berth) is ready for paint, and will receive its first coat in the coming days.


I moved aft to sand the fairing compound I had applied to the companionway.  This surface is also ready for primer paint.


Here's where the painting derailment took place.  I was ready to solvent-wash the cockpit locker space after having earlier vacuumed it, but allure of resolving the old fastener holes and uneven surfaces on the transom was just too great.  I ditched the painting idea and took to the stern.  

The surface underneath where the aft chainplate resided was uneven, and it ran nearly the entire height of the transom.  The old chainplate was very narrow, a bit on the thin side, and much too long. The owner of the Allied 24 is having new chainplates fabricated, with the new aft chainplate to be shorter and wider, with a bit more "meat on the bone".  Aesthetically, the new aft chainplate will be a dramatic improvement.  

So to repair the surface, I ground a convex surface from the deck to the counter.  This area will have fiberglass applied to it as well as fairing compound to bring the surface to fair.  I also tapered the old fastener holes to port of the aft chainplate surface repair.


In the lazarette, I easily removed what turned out to be a backing plate.  The backing plate, at first, appeared to be glass to the hull's surface, but as it easily was removed then changed my plans on how to deal with it.  Originally, I intended to taper the openings to the old fastener holes on the interior and fill them with thickened epoxy.  With the backing plate off, I decided to now permanently glue it to the hull with epoxy resin, fill the holes, and then apply a layer of 1708 biaxial to the interior surface.   


To get started, I cleaned up the surface of the hull where the backing plate was mounted, as well as the backing plate itself.  I used a 40-grit flap wheel on the angle grinder to accomplish this.  This tool always gives me pause...it's a little Tasmanian Devil in the hand.


With the surfaces prepped for further work, I solvent-washed them and then took some basic measurements for fiberglass.  Where the old chainplate resided, and where in which I ground the convex surface, I wet the surface with epoxy resin and then applied two layers of cloth: a 10 oz layer and a 1708 biaxial layer. 


I came back with thickened epoxy, and applied a layer to the chainplate surface and the old fastener holes to port.


On the interior, I applied a layer of 1708 biaxial to the aft chainplate "backing plate" (now epoxied to the surface of the hull), and to the interior side where the old fastener holes were located.  On top of these fiberglass applications, I applied a layer of peel ply to reduce the sanding required for paint prep.


With the balance of the thickened epoxy, I faired out the overhead at the transition point of the integral mast support beam and the overhead itself.  With a plastic squeegee, I pulled the fairing compound aft in order to fill the weave of the layer of 1708 biaxial I recently applied.


Total Time Today: 5 hrs

Tuesday, July 9, 2019

Final Layer of Fiberglass on the Mast Support Beam & Misc.


July 9, 2019


A local rigger stopped by today, and along with the owner (via phone), we discussed the scope of work for the boat's standing rigging.  The work ahead for the rigger, actually a husband and wife duo, will include wiring the mast for vhf, spreader lights, and a tri-color light; fabricating a new 7" x 7" mast step, a new aft chainplate, replicating the six shroud/stay chainplates; new standing rigging, to include staylock fitting, and roller furling for the head sail; a chart plotter and depth transducer; odds and ends for the mast and boom.  Very excited for the owner!

After getting my wee one to bed, and before grabbing dinner, I wanted to get a couple items done on the boat: a final layer of 1708 biaxial cloth fiberglass for the mast support beam, between the primary bulkheads, and sealing the balsa core on the interior of the companionway.

To get started, I went aboard and measured for the layer of fiberglass to be applied to the mast support beam: 20" in width by 10.75" in length.  I also used a spiral saw and removed roughly an 1/8" of balsa core I installed at the companionway - seen in photos below.


I mixed a small bit of epoxy resin, and after solvent washing the mast support beam, I wet it out to prep for the application of fairing compound and eventually the 1708 biaxial cloth.


I also wet out the balsa core in the "trench" that I created with the spiral saw.  The purpose here is to isolate the fresh balsa core from any potential water penetration, and thus ruining the strength of the sandwich core construction.


I returned to the shop to wet out the layer of 1708 biaxial cloth and mixed a small cup of thickened epoxy.  I carried both the wet out cloth and the thickened epoxy to the boat for application.  On the surface of the mast support beam, I applied the thickened epoxy to fill in low spot and very small voids, essentially smoothing things out for the the fiberglass cloth.  I then applied the balance of the thickened epoxy to the "trench" at the companionway.


With the thickened epoxy on the mast support beam, I then applied the wet out fiberglass.  I carried it to the boat on a scrap piece of cardboard covered with plastic, and as I was ready for it, I removed it from the plastic covered cardboard and set it into place.  I pushed out all of the trapped air, ensuring that the fiberglass cloth had full contact with the mast support beat and transitioning over the applied fillets and onto the overhead.  I finished the installation with a layer of peel ply.  This peel ply would eliminate the need for water-washing to remove the amine blush and sanding in order to proceed with additional epoxy/painting work.


I mixed another small cup of thickened epoxy and faired the surface of middle portion of the core work on the aft bulkhead of the cabin.


I finally received the new seacocks today, after waiting nearly 6 weeks, and was interested to see how they would orient inside the settees. I selected the 1" Perko with a 90 degree elbow. 


The 90 degree elbow would allow the incoming drain lines to neatly fit through the existing cutouts in the molded fiberglass settees.  The original through hulls (no seacock) were installed inboard of the fiberglass molded settees, and in that location were both unsightly and would interfere with the Torqeedo battery box, which would also serve as the landing platform as one would go below.  I intentionally left the area unpainted since I would need to install a backing pad for the seacock to be installed on.  As can be seen in the photo below, even with the backing pad there is ample room for the new seacocks to be tucked away in the fully accessible settee lockers.


Total Time Today: 1 hr

Sunday, July 7, 2019

Final Sanding & Fairing Application for the Cockpit Well


July 7, 2019


With a few chores around the house on the books for the morning, and successfully taken care of, I got to work on the boat in the afternoon.  I had but a few hours, but was narrowly focused on the surface preparation for primer; specifically, the cockpit well and Coachroof.  I had completed fairing the foredeck in the previous work session.  I first started by water-washing the previous day's application of the TotalFair fairing compound, including spot fills in the v-berth.

I grabbed sanding tools and proceeded over to the boat, starting in the cockpit well.  I used the Bosch and 6" 80-grit pads to sand the first application of TotalBoat TotalFair.  This TotalFair fine fairing filler sands essentially like the West System 410 microlight product.  It's an easy product to sand, making it a great product to use for detail work and extremely shallow low spots.

I finished the cockpit floor's aft repair with ease, and with spartan use of my time.  There were but a few very shallow low spots that required another application of the TotalFair before calling this surface primer-ready.


I then moved over to sand the closed in old ice box, again moving swiftly through the TotalFair product.  I noticed in the center of the repair area, almost running the length of it, there was a rather broad but shallow low spot.  I would apply another skim coat before the close of work.


I moved up to the coachroof and completed the final sanding of this large repair area.  I have now checked this off the list, the coachroof is ready for primer paint.

After completing the day's sanding on the exterior of the boat, I moved into the v-berth and began sanding spot fills that I applied yesterday evening.  I had a good amount of the TotalFair epoxy filler left over from applying it to the coachroof yesterday, and so I went below and identified areas that required a spot fill.  As I went, I solvent-washed and then applied a bit of the fairing compound.  Today, and after water-washing the amine blush earlier, I sanded the spot fills to fair.  After wrapping this task up the v-berth is now ready for paint: overhead, ceiling, and v-berth itself.


With the sanding complete for the day, I retrieved some acetone from the shop, I then proceeded to vacuum and solvent-wash the surfaces requiring additional work.  The first area was the aft cockpit floor, port side.  I applied a very thin coat of the TotalFair product to just fill the remaining few shallow low spots.


I also applied a bit to the vertical surface of the starboard seat.


Finally, I applied the TotalFair to the old ice box repair.  As mentioned earlier, there was a shallow spot running the fore-aft length.  I ran a couple passes with a broad knife to complete the seating repair.  These few additional applications of fairing compound should complete the boat's exterior to the point that I can get a proper first coat of primer paint on.  This first coat will, as I intend and fully expect, show a number of imperfections that will require spot filling.  A beautiful paint job is 98% prep work.


Total Time Today: 3.5 hrs


Saturday, July 6, 2019

More Sanding & Fairing - Final Application of Fairing Compound


July 6, 2019


I imagined that I had dialed in the fairing of the coachroof and foredeck with yesterday's application of what I thought would be my last.  Wasn't to be, at least for the coachroof.  The foredeck is finished, faired smooth, and ready for primer paint.  The coachroof, turns out, would need a touch more.

I started the day by water-washing the areas that I had applied fairing compound in yesterday's work session, and with the amine blush thus removed, I then proceeded to sand those areas.  I started at the starboard coachroof repair, using 6" 80-grit hook and loop pads that almost want to make me trash what's left in the box - never will I again purchase this brand.


I moved into the center of the field, including the mast step.


Finally, I completed the sanding with the port side of the coachroof repair area.  I cleaned the surfaces by vacuuming most of the dust and debris, and then solvent-washed it to remove any remaining contaminates.  Using a straightedge tool and marking pencil, I located the areas that would need a bit more fairing compound.


With the coachroof ready for more work, I moved on to the foredeck and completed sanding the light skim coat I applied in yesterday's work session.  The foredeck is now complete....well, ready for primer paint.  A milestone nonetheless.


I moved back aft, into the cockpit, and began with the hand sanding routine to get the inside corners and tight radius transition between the perpendicular surfaces.  With that grueling portion of the sanding complete, I then turned my attention to the larger aft repair in the cockpit floor.  The second application of fairing compound nearly got the surface to fair, but nearly would not be enough, so I prepared for another application of fairing compound.  


After vacuuming and solvent-washing the cockpit, I prepared the material that I would need for this application of fairing compound.  I used the TotalBoat TotalFair epoxy-based two-part fairing compound for the balance of the fairing work that I had.  This two-part product is a quick mix and easy to apply.  It can be sanded within three hours of application, though I would be sanding in the next work session.

I applied the fairing compound to the repair area enclosing the old ice box.


I then moved down to the cockpit floor itself and applied a skim coat of this material there.  After touching up a few smaller areas, I transitioned to the coachroof.


I had marked the areas that were a bit shallow, and with a large knife and a large squeegee, I applied the fairing compound to the coachroof spots identified. I should have a rather quick sanding session to follow today's work, and hopefully primer will be in my near future.


Total Time Today: 4 hrs

Continued Fairing & Sanding on the Coachroof, Cockpit Well, and Foredeck


July 5, 2019


Continuing the work on fairing surfaces in preparation for primer paint, I continued work on sanding the coachroof, foredeck, and cockpit well areas (the remaining large repair areas needing attention on the exterior).

Using the 6" Bosch and 80-grit pads, which by the way have a near worthless hook and loop system, I began on the coachroof.  This iterative process of applying a skim coat of fairing compound and then sanding is a delicate and, unfortunately, time consuming one.  The silver lining to the coachroof, and foredeck as well, is the rather large and unimpeded work area.  The cockpit well, with its many surfaces in various orientations to one another and including tight spots that only one's fingers will fit into, is a labor intensive beast.

I worked from the starboard side over to the port, and finished with hand sanding the small radius at the transition from the raised forward hatch frame to the coachroof surface. 


Moving forward, I rather quickly completed the sanding of the thin coat I applied in the previous work session.  What remained after this sanding were lines left from the 6" knife's sharp edges.


I mixed a small pot of epoxy resin and then thickened it with West System's 406 colloidal silica and 407 low-density fairing compound, and applied this to the coachroof with a smaller plastic squeegee.


I then repeated the application to the foredeck, concentrating on filling those small lines left by the rigid knife's edges.


What I did not manage to take a photo of was the post sanding of the cockpit well.  I applied the first coat of fairing compound in the previous work session - a short session on the 4th of July.  Today, I not only sanded the large area aft, where I had installed new balsa core, but also the perimeter of the cockpit floor where it meets the vertical surface of the seating.  I used the same concoction of West System products for the fairing compound, and applied it to the sanded areas requiring an additional skim coat.  I am hoping the next sanding will reveal only spot areas needing another skim coat.


At the conclusion of the sanding and fairing, I took a few minutes to adjust the bow to stern orientation of the boat - getting ready to secure the waterline in advance of sanding the topsides of the hull.


Total Time Today: 5 hrs

Friday, July 5, 2019

Continued Fairing Work: Cockpit Well, Coachroof and Foredeck


July 4, 2019


With some errands to run in the afternoon, and it being the holiday, I got to work in the morning with just a bit of available work time.  In thinking of the next day, I wanted to get another skim coat of fairing compound on the coachroof and foredeck (likely their final), as well as a first application for the aft of the cockpit well where I installed new core and top skin.

The surfaces were all prepped, in terms of sanding, from a previous work session, so all there was to do was wipe them down with a solvent to clean any remaining surface litter.  I mixed the usual 406 colloidal silica and 407 low-density filler combination for the fairing compound, and applied it with a 6" knife, beginning on the coachroof.


Next, I worked my way forward and applied another small batch of thickened epoxy to the foredeck.  


Finally, I returned to the shop to mix yet another batch of thickened epoxy to begin to fair out the repair to the cockpit floor.  The next working session will reveal what additional fairing needs to be done in this location. 


One lingering item to do in the cockpit locker area preventing me from applying the barrier coat paint was tabbing on the port side.  A transverse cockpit bulkhead, made to support the cockpit well itself and also close off the forward interior of the boat to the cockpit locker storage area, was not tabbed to the vertical surface of the port seat (interior).  I took a measurement for the length of tabbing required, returned to the shop and cut a 4" wide and a 6" wide length of tabbing, 13" in length.  I then wet out the tabbing with resin, as well as the surfaces in the boat to which they would be applied, and then set them in place.  I did not use peel ply on this tabbing installation, so will need to water-wash and sand prior to painting this space.


Total Time Today: 1.5 hrs

July 29, 2020 The day had arrived!  Time to apply the name of the vessel...S/V Sea Hagg, hailing out of Key Largo (there's on...