December 21, 2019
With the old cockpit scuppers removed and glassed in, making a fresh canvass to work from, and the cockpit freshly primed, I marked to drill for new cockpit scuppers. I purchased a pair of Marelon flush head thru-hulls for the new cockpit scupper drains. The plan was to mount these thru-hulls to the underside of the cockpit well - epoxy-gluing them onto the underside surface of the cockpit well. To that end, I made a template from 3/4" meranti plywood that put the center of each thru-hull approximately 1.75" from the forward face of the cockpit well and 1.75" from the outboard face of the well. I tapped a center punch to mark for the drill bit, and then with a hole saw drilled out the drain opening for the cockpit scuppers.

On the underside of the cockpit well I applied the 1" belt sander to remove the epoxy-based barrier coat I had previously applied...prepping for epoxy work.

I repeated the effort on the port side of the boat.
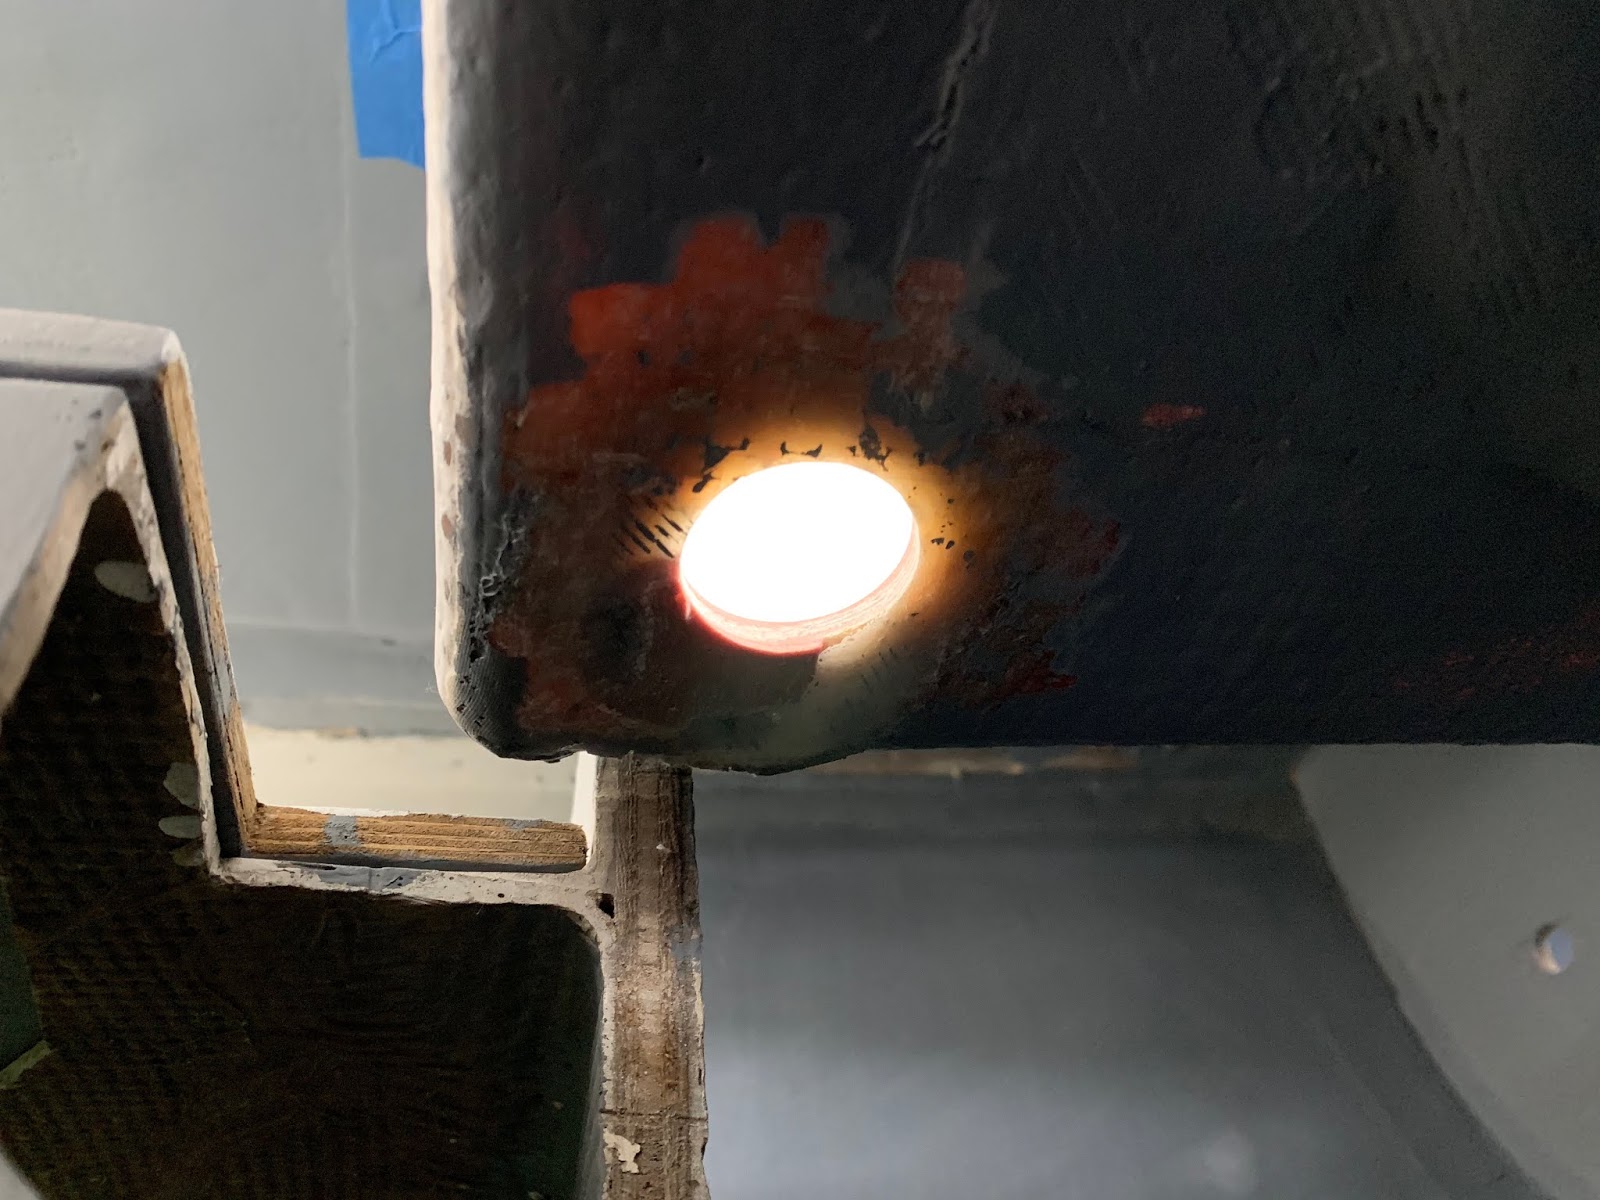
After cleaning the sanded surfaces with acetone, I laid down a layer of protective tape, cut out the drain opening, and then positioned the flush mount thru-hull to the underside of the cockpit well. It took me a few iterations of taping, reconnaissance, and adjusting the thru-hull until I was centered. When I achieved 'center', I marked the thru-hull onto the tape, and then cut out the interior portion of the thru-hull.

This donut within the blue tape would be the area onto which the thru-hull would be epoxied.

Back in the shop, I mixed an ounce of resin to wet out both the tops of the thru-hulls and the underside 'donuts' of the cockpit well. The tops of the thru-hulls were sanded well with 60-paper, creating that rough surface to promote a good mechanical epoxy bond.
I mixed another small pot of epoxy resin, but this time thickened it with West System's 406 colloidal silica to fill-in and glue to the fairly uneven surfaces of the underside of the cockpit well. I applied the thickened epoxy to the thru-hull and pushed them into position. I cleaned up the sufficient squeeze out from the underside as well as contouring the squeeze out from inside the cockpit well.

I will come back in the coming days to further sand (fair) the interior surfaces and prep them for primer paint.

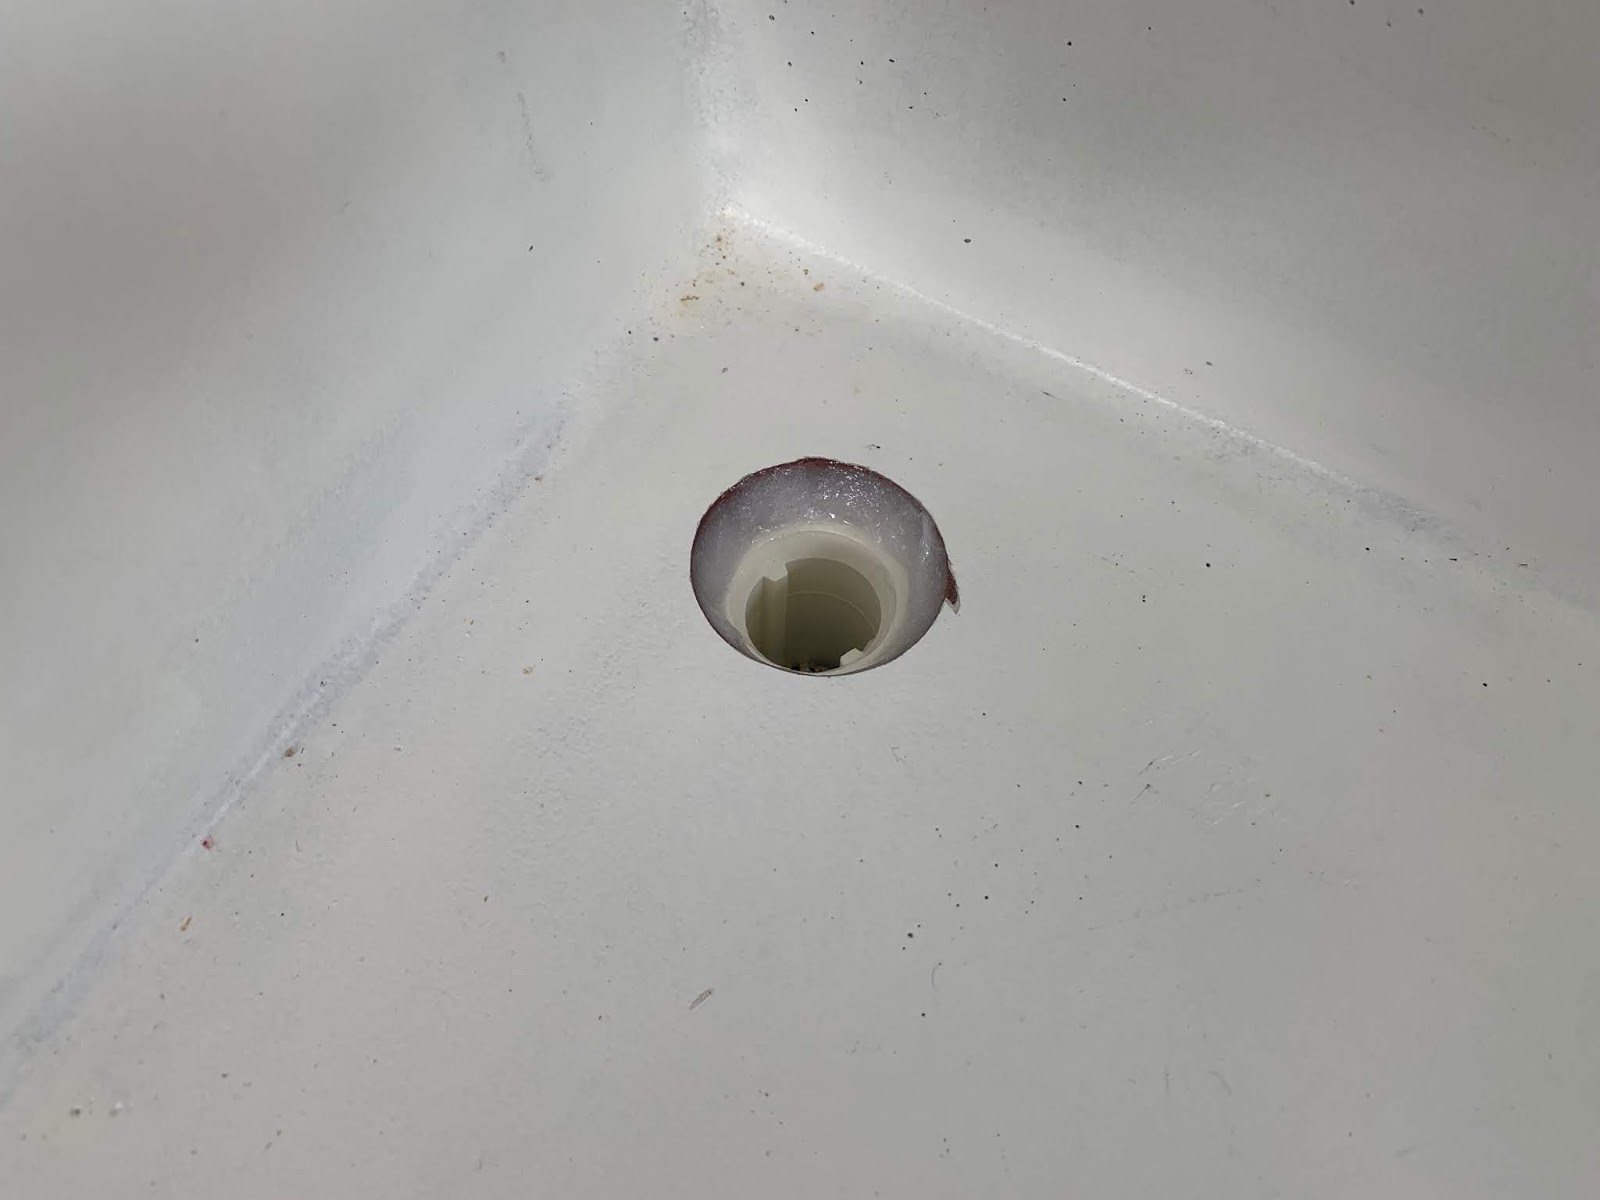
The port side thru-hull held in position with tape.

The starboard side thru-hull held in position with tape. I will be wrapping a bit of fiberglass around the flange of the thru-hull to further support it from the underside of the cockpit well.

With the cockpit scuppers tucked away for full cure, I turned my attention to the cockpit lockers. I had applied a skim coat of TotalBoat TotalFair to the final shallow spots across the surfaces of the locker lids, and now I needed to sand those smooth (fair).
With 60-grit paper, for the more significant fairing compound applications, and 180-grit for the finish work, I sanded the lids smooth and prepped them for primer paint.

I returned to the shop to work on the new coaming return blocks. I pulled the old blocks out of storage to review their dimensions. After closely inspecting the coaming blocks, and factoring in the time ($) to rework the blocks, I decided that the best course of action would be to simply restore the old ones. They were in fine enough condition that would enable me to clean them up, address some minor issues, and then recycle them into the refit project - may even save a couple hundredths of a degree in the global warming effort.
After removing the caps on the blocks (held with 2 silicone bronze screws), I sanded the blocks down with 60 and 180-grit paper to remove the old and weathered varnish coat.

After wiping the surfaces down with acetone, I taped off the 'minor issues' to protect the surrounding surfaces from excessive epoxy resin. The issues were of the sort related to swelling and cracking wood, and needed to be filled to arrest any further movement. I choose to fill the cracks with epoxy resin thickened with wood flour. This wood flour is fine sawdust that I had saved from an earlier refit project. Since I would be varnishing the wood, and thus the surface would be accented and on display, the wood flour would blend well with the natural material of coaming block. I wet out the areas to be filled, making sure I thoroughly pushed neat resin into the voids.

I then mixed the remaining neat resin with the wood flour to thicken things up sufficiently.

With a small squeegee, I worked the thickened resin into the voids. I will come back later, remove the tape and finish sand the surface to prep for sealer coats of varnish.

Total Time Today: 4.5 hrs


No comments:
Post a Comment