April 27, 2019
The aim today was to get the old thru-hulls closed in, as well as the cockpit drain holes that I had recently opened up by removing the scupper fittings.
I began by templating the layers of fiberglass that I would need in order to close in the various holes.

I laid out a sheet of plastic over the area to be repaired, marked the location, and then traced a pattern to be cut from the 1708 biaxial cloth I had back in the shop. I marked the orientation of the layers of glass in order to ensure they would be applied as originally laid out.

I made my way around the boat, marking the four thru-hulls that would need to be closed in with laminations.

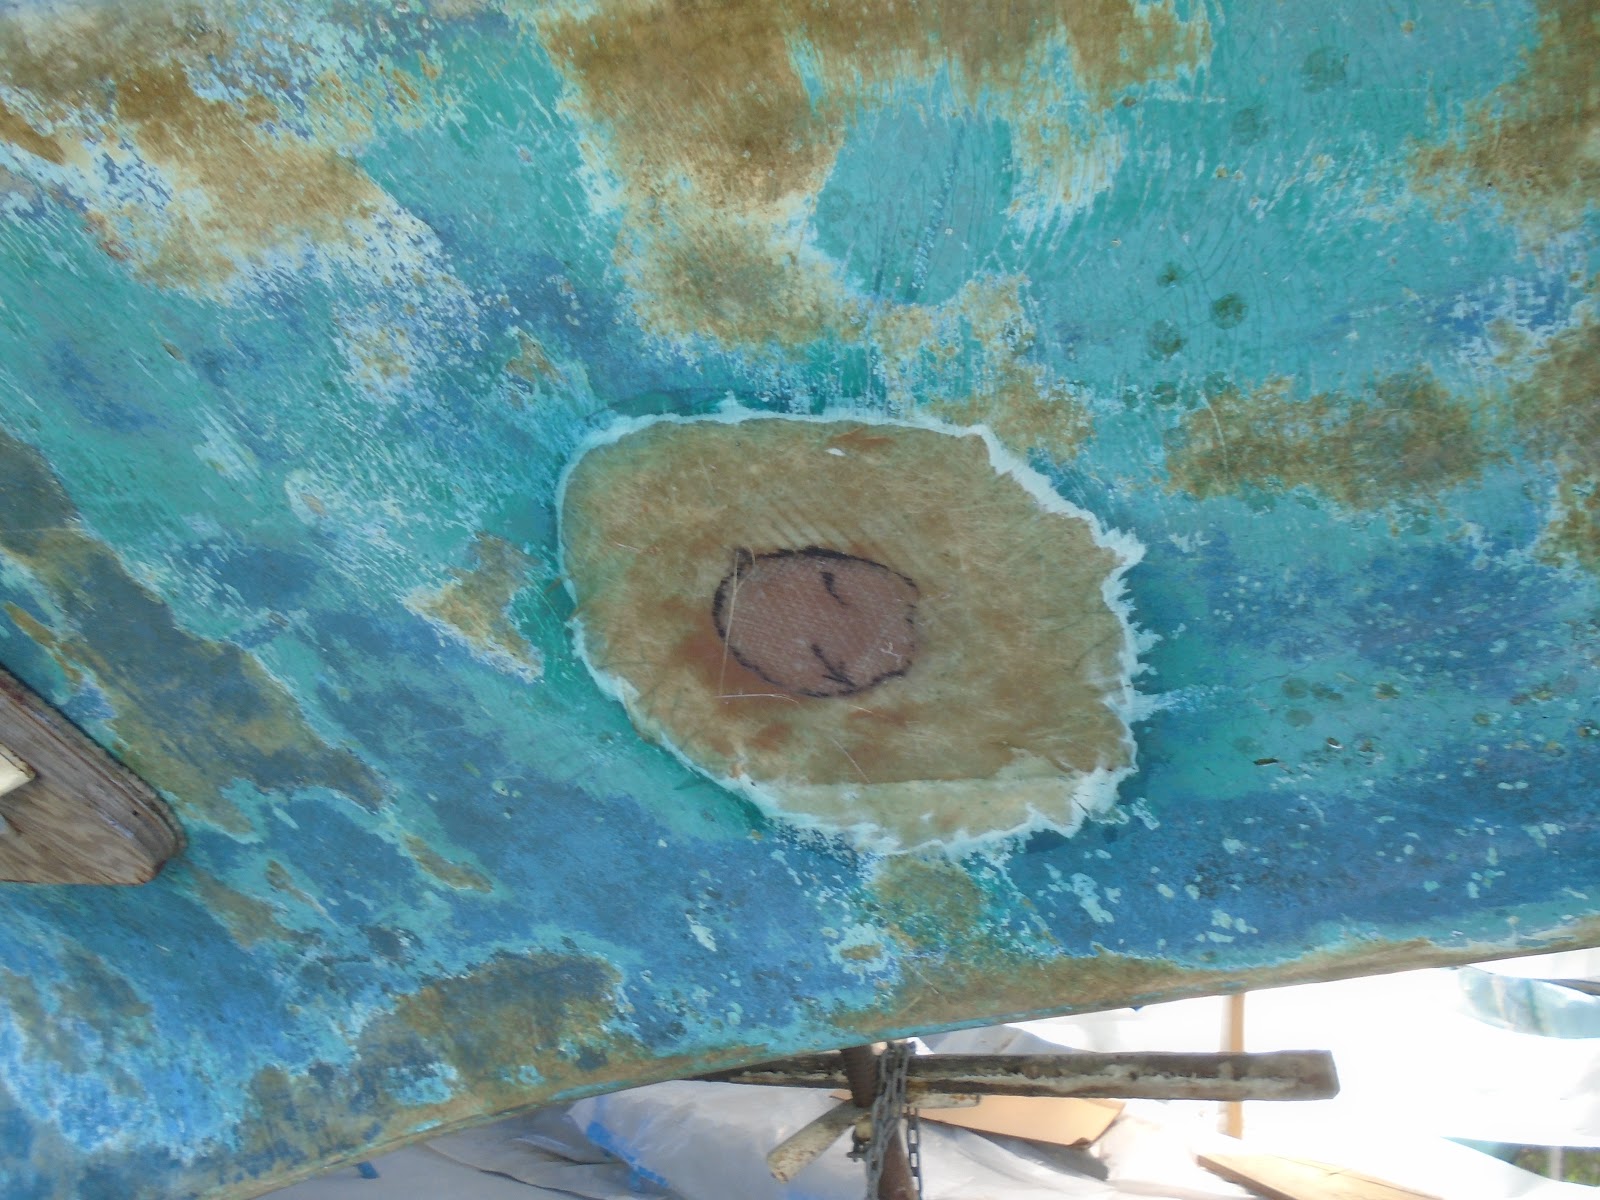
In a previous work session, I had ground tapers in the location of the old thru-hulls and followed the 12:1 taper rule radius of new fiberglass to width of existing laminate.

I then moved to the interior of the boat and marked for the laminate patches to be placed here, and started with the cockpit thru-hulls.

The port side was a solid laminate up through to the surface of the molded liner, while the starboard side contained a depression that would require more layers of glass to fill in.

I then moved up into the cockpit to create laminating patterns for the location of the recently removed drain fittings.

We will be starting over in this area as well, with materials ordered in in transit.

I then moved forward in the interior of the boat, and created patterns for the location of the previously removed seacocks for the head. The thru-hull fittings had been capped by a previous owner, so it was time to rid the boat of these.

The new owner has elected not to reinstall a head with water intake and discharge, but rather go with a portable version since the boat would be used as a weekender / coastal cruiser. These holes, along with the interior liner, will be completely glassed.

With all of my patterns created, I returned to the shop and cut the various layers of 1708 biaxial, making sure to keep things organized.

I began at the forward starboard thru-hull, and wet the surface out with resin. I then proceeded to laminate the new 1708 biaxial cloth in place, bringing the surface up to relatively fairness with the surrounding liner.

I repeated the process on the port side, and then laid a layer of peel ply on top of the laminations.

I then moved back to the location of the cockpit well thru-hulls, and glassed those in. I also sealed the surface with peel ply.

I moved up onto the cockpit well itself, and repeated the steps to glass in these holes. I did apply a skim coat of thickened epoxy on each of these in addition.

Back outside, I moved around from old thru-hull location to location, and applied the laminating schedule to complete these repairs. I began with the aft port thru-hull. I wet the surface with resin and then apply a small amount of thickened epoxy to fill in the void between the interior fiberglass and the exterior surface of the hull.

I will no doubt need to come back and apply skim coats of thickened epoxy to bring the surfaces to fair.

I also applied the peel ply to these repairs, which will greatly reduce the need for sanding.

The forward starboard side of the boat was neglected for a few minutes, just enough time for things to begin kicking and preventing me from applying the final two layers of 1708 biaxial cloth. Further laminating will have to wait until this repair cures and I can water-wash then sand it to prep for further laminations. Happy with the progress, and much closer to paint!
Total Time Today: 4 hrs


No comments:
Post a Comment