January 12, 2019
I was excited to get back on the Allied 24 today, and did just that after running some errands in the morning. My first order or business was to further prepare the coach roof for new core material and top skin installation. I removed additional top skin and core to the aft of the existing open area, allowing for an easier, and I believe stronger, installation of the new material. After removal of a couple ~6" x 8" areas, one to port and one to starboard of centerline, I sanded a proper taper on the adjacent existing top skin to allow the new top skin cloth to tie into it. I thoroughly vacuumed the surfaces and wiped them down with a solvent to prep for epoxy work.

My next order of business was to protect the coach roof camber - the convex surface - as I weight down the new core material during installation and through its curing time. I plan to bed the new balsa core material in a bed of thickened epoxy, and will then place weights across the installation to ensure that no voids result. I took a piece of 1" x 1/2" white oak from my shop and cut kerfs perpendicular to and along its length. The kerfs, or shallow cuts, would allow the piece to bend to the coach roof camber. This kerfed piece of white oak would be the temporary support beam, along with bracing, allowing me to weight down the new core and also protecting and even improving the shape of the coach roof.

I used some additional scrap material and braced the coach roof from within the cabin.

Back on top of the deck, I laid out a few pieces of plastic sheeting to template the layers of 1708 biaxial cloth (new top skin) and the balsa core material.

I brought the templates to the shop and laid them out for material removal. I began with the larger aft template. I laid out the larger, outer layer of 1708 biaxial, and traced around the pattern.

With a pair of sharp scissors (slowly dulling by cutting this thick glass), I cut out the larger layer of the top skin.

Next, I cut down the pattern, or template, for the smaller, inner layer.

I traced around the smaller, inner layer of top skin, and then cut it out.

Finally, I used the same template for the smaller, inner layer of top skin, and applied it to the fresh balsa core material. I traced around the pattern, transferring it to the balsa.

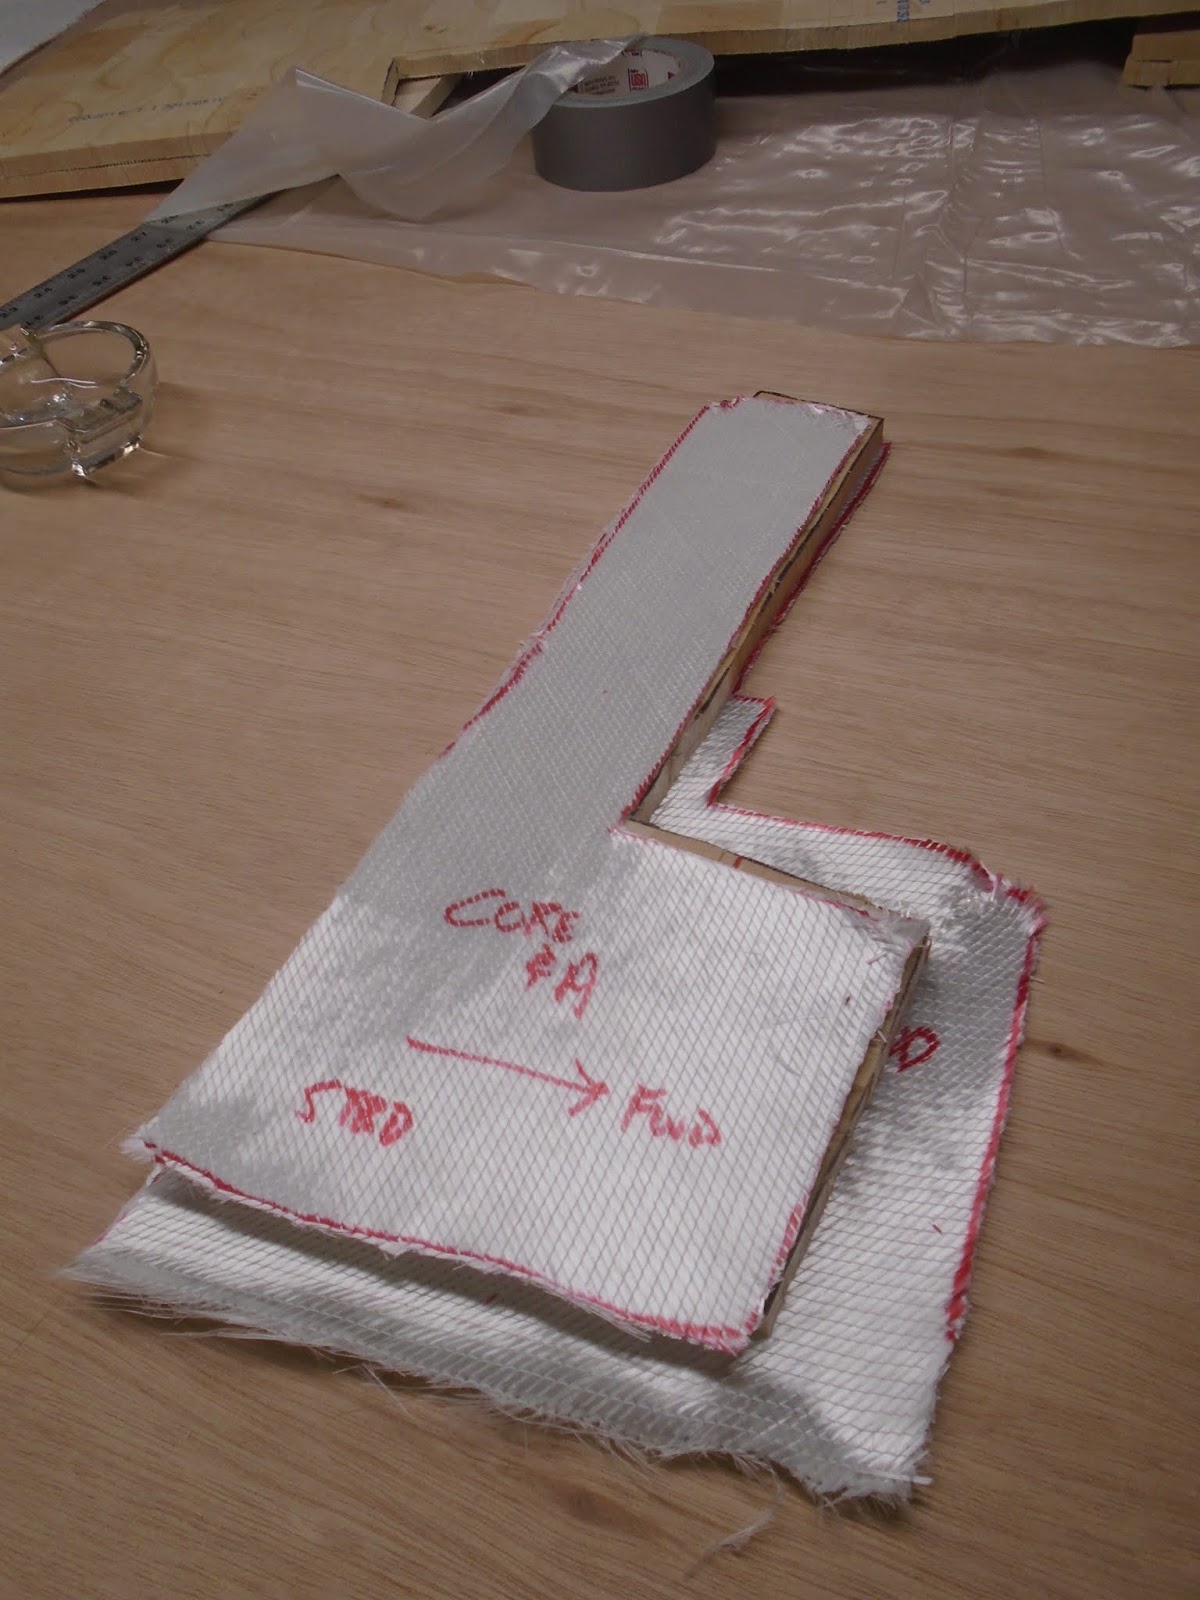
With a sharp razor blade I then removed the new balsa core, the aft section, from a new sheet of balsa material. I now had two layers of 1708 biaxial cloth and a layer of balsa core removed for the aft portion of the coach roof repair. There are three primary sections for the installation of core and top skin on the coach roof: large aft section, and two smaller sections forward to port and forward to starboard.

As I did for the larger aft section, I repeated the process of removing first the outer layer of cloth and then the inner layer, and finished with the balsa core material. The section below will be to port, forward of the larger repair area.

I also prepared the starboard portion, again forward of the larger repair area. Two layers of 1708 biaxial and one layer of balsa core.
I cleaned up the shop and laid out the material comprising the three sections of coach roof core and top skin repair.

Prior to closing the shop for the evening, I transferred sand to several one gallon storage bags. These bags will be used as weights that I can move around the coach roof and which will weight down the new core installation. The plastic will not stick to any errant epoxy, and the sand will allow conformity to the deck surface. All prepped.

Total Time Today: 4.75 hrs


No comments:
Post a Comment