April 25th and 26th, 2020
Over the last couple of days, I have been working to prep the topsides for her 5th coat of paint as well as addressing various tasks associated with the cabin and v-berth trim. Early this morning, I applied the 5th coat of Alexseal - which laid down very nicely!
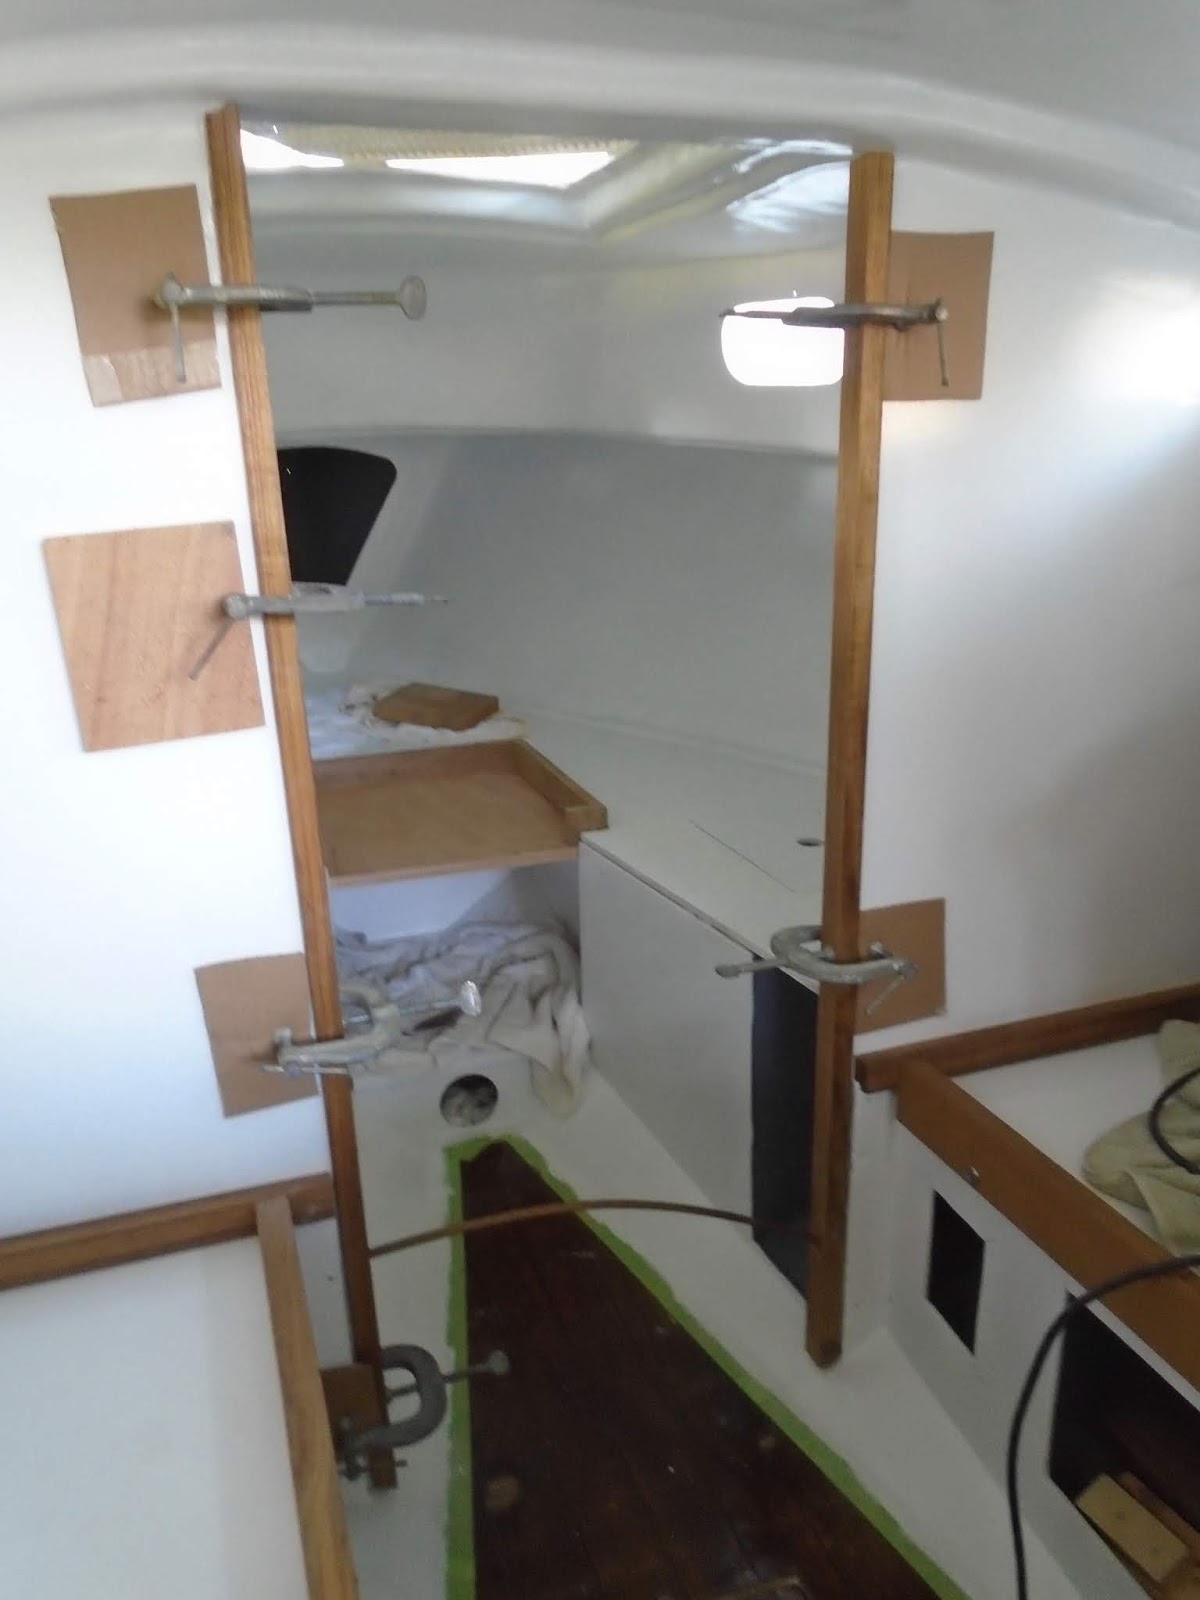
Yesterday was mostly spent working on the trim components. The first of the trim I installed, with a permanent installation by use of epoxy, were the inboard edges of the primary bulkheads. These pieces would never need to be removed, so I decided to bed them in thickened epoxy, using 406 colloidal silica. I sanded the inboard edges of the bulkheads to expose raw would, and then followed that up by vacuuming up the sanding debris and cleaning all surfaces with acetone. I wetted the surfaces to be glued with epoxy and followed that up with application of the thickened epoxy resin. Three-point clamps were used to keep the trim tight to the bulkheads, with cardboard protecting the painted surface of the bulkheads.
With the bulkhead trim in place and curing, I moved on to the settee trim in the cabin. Four #12 machine screws would secure each trim board (fiddle) to the settee, and would use a finish washer.

The small section of trim aft of the primary settee fiddle would be secured by three #6 wood screws, also with a finish washer.

I placed the fiddle on the settee, and then marked for where fasteners would be used. I evenly spaced the fasteners along the length of the trim piece, and then pre-drilled in order to tap the holes for the threaded fasteners. The installation went without issue after spending time thinking through the location of the fastener on the trim piece and the method of securing them. The small, aft section of trim cannot be seen in the picture below, but resides just aft of the primary settee fiddle and outboard of the landing platform. In fact, this small section of trim is fastened to the side panels of the landing platform itself.

Having had previously cut the various trim components for the v-berth's removable insert (well, almost all of them), I made some additional measurements and plans to complete the assembly of it. I removed the insert and trim pieces, taking them back to the shop, and proceeded to assembly them. I first assembled the trim components, countersinking #10 wood screws at the butt joints, and then fastened that frame to the meranti plywood. I sanded the edges to ease them for ease of handling and comfort, and then set the insert back in place. From here, I gathered some additional measurements using the v-berth trim boards just aft of the insert, and carried those measurements (and the v-berth trim boards) down to the table saw. I needed to fill in roughly 3/4" of length between the v-berth trim and the insert trim, so I transferred the angles cut onto the ends of the trim to the table saw blade with a bevel, and proceeded to cut the filler pieces that I required. While at the table saw, I also cut a piece of trim for the center portion of the v-berth insert.

I carried the insert, its center trim piece, and the v-berth trim boards with their extension pieces back to the shop, but I was out of time for the evening. I'd pick up things in the morning.

I arrived at the shop well before sunrise in order to complete the glueing that was required on the v-berth trim boards and the insert's center trim piece. I wanted to use this pre-dawn time to knock out the epoxy work prior to getting into the topsides paint application. This task was straight forward: cleaned the surfaces to be glued with solvent, wetted the surfaces with resin, and then assembled them with some additional thickened epoxy resin. I have a bit of finer detail work to clean them up for installation, and that would come once they had fully cured.

I also glued the v-berth insert's center trim piece in place, protecting the surrounding surfaces with tap and assembling with clamps. It was now time to paint!

I had a bit of minor sanding to do on a couple spots, so I knocked that out rather quickly and got straight into prepping for the paint application. Back in the shop, I mixed the pot of two-part Alexseal topsides paint and set it to the side for its induction/catalyzing period. While the paint was doing its thing, I wiped the surface of the boat down thoroughly. I first used slightly water-dampened rags to pick up a majority of the remaining paint dust, and then came behind that with rags dampened with a solvent to complete the prep.

Paint went on with no issue, and the finish coat ratio of thinner I used behaved well in the early morning temperatures, leveling out beautifully.

Other than the random small insect, which should not impact the paint job harshly, the finish coat looks beautiful. On to the cockpit and deck paint!

Total Time over 2 Days: 6.75 hrs


No comments:
Post a Comment