October 5, 2019
I started this morning, only having a few hours to work, with getting to work on creating the companionway hatch and its slide rails. Using a scrap piece of cardboard and with the companionway deck trim in place, I transferred the dimensions of the companionway opening onto the cardboard. Taking in to account the width of the companionway deck trim, and wanting the companionway hatch to overhang the trim by roughly 1/8" to 1/4", I enlarged the dimensions of the hatch necessarily.
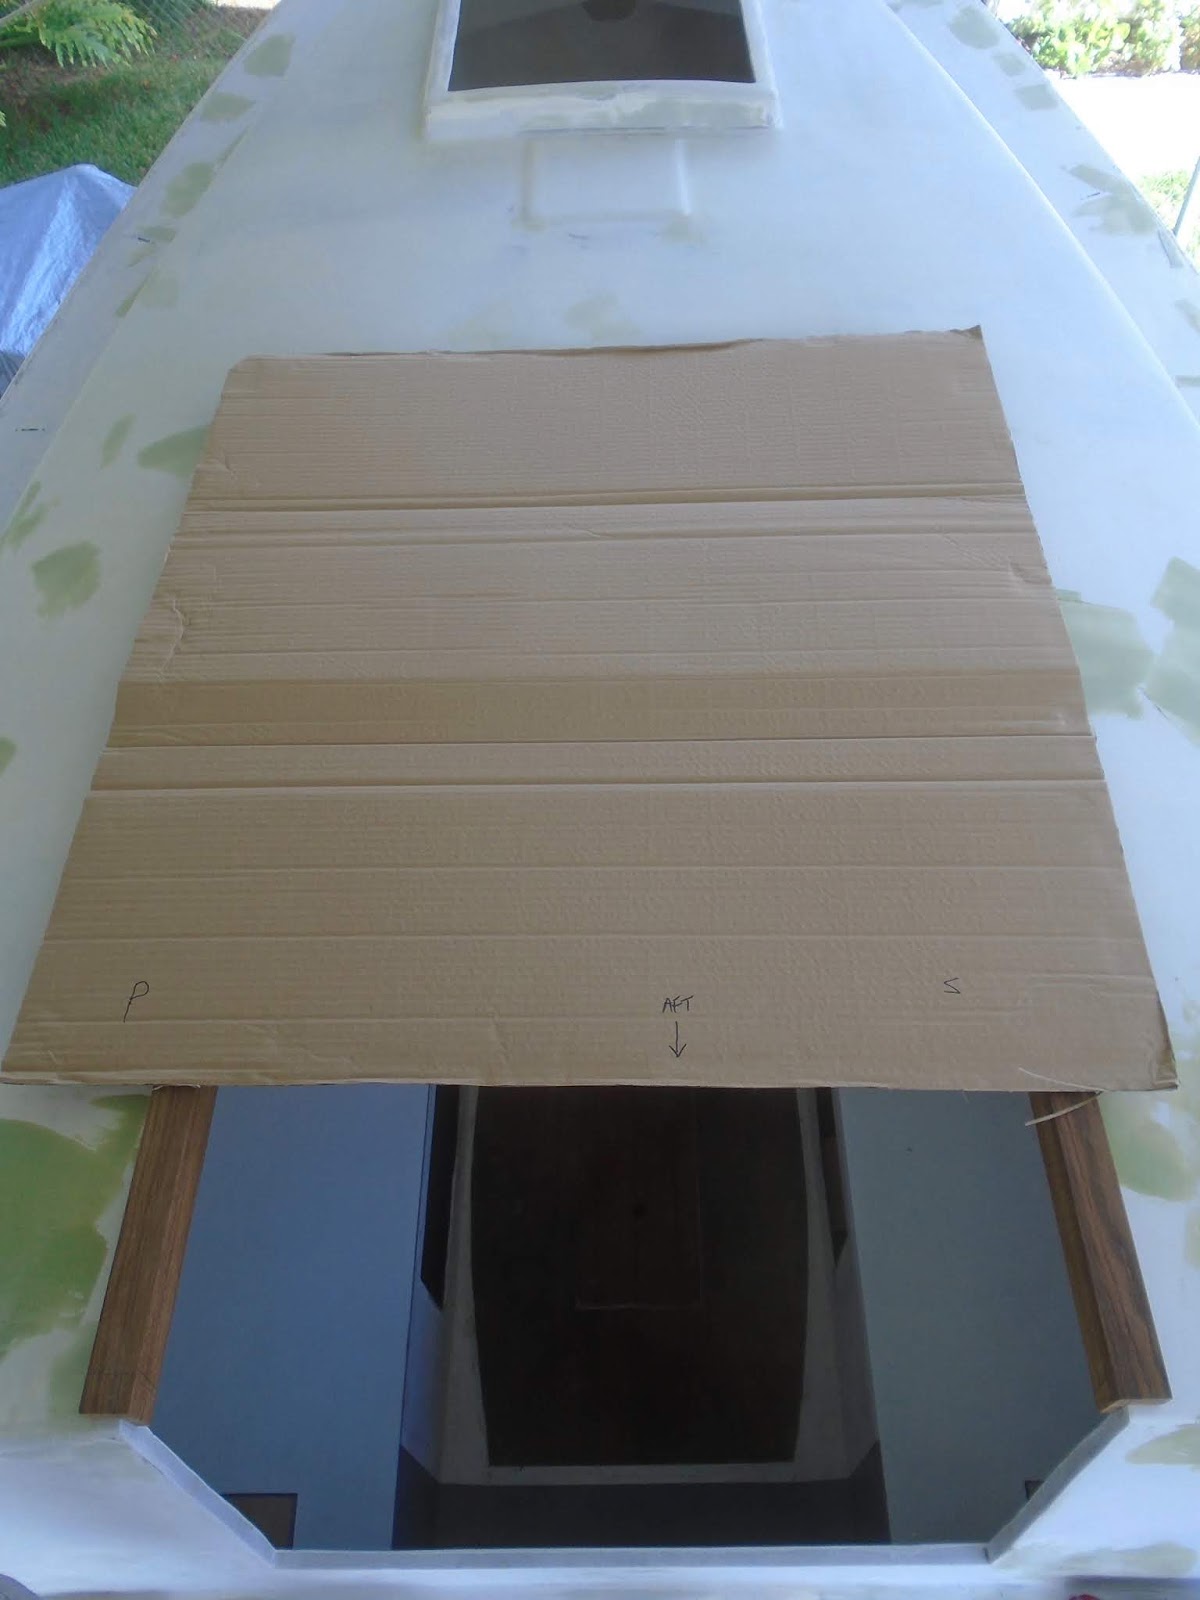
The hatch ended up measuring 26" by 26-3/8".

Next, I wanted to get a sense of the required length of the hatch slide rails, and so I clamped a piece of wood onto the edge of the cardboard to act as the width of the hatch frame. I then pushed the cardboard, with the analogue frame of the hatch clamped in place, back flush against the forward piece of companionway deck trim.

This gave me a comfortable 48" length for the slide rails.

Back in the shop, I made some notes on the companionway hatch dimensions, as well as the slide rails. I then returned to the boat with a portion of the cardboard material, and used a compass to transfer the camber of the deck onto the cardboard. The companionway hatch will utilize the deck camber in its design - which turns out to be a subtle roll from port to starboard.

With notes taken on the companionway hatch, I set it to the side to focus on the slide rails. I grabbed the last of the remaining thicker stock (1.5" x 8" x 10 feet), and began to mark out for cuts. I removed a 48" length of the 8" wide board and ran one edge over the jointer. I then ran the jointed board over the table saw to rip the 3" tall slide rails from the stock material.

Having the roughed out boards completed, I then returned to the shop to begin to impart a pleasing shape onto the slide rails. I decide to begin a taper 8" forward of the aft edge and down to the forward edge, reducing the forward edge by 1.5"

I then rounded over the forward edge for a smooth transition.

In the shop, I removed the material eliminated by the design, doing so with a jig saw. I used a hand plane and hand-sanding to further refine the shape and appearance. I took the companionway deck trim and slide rails out to the boat for a rough fit. All looked well, though I would need to taper the bottom edge of the slide rails to account for the deck camber.

In the shop I used a hand plane to reduce the inboard edge of the slide rail, as it contacted the deck / coachroof. The slide rails still require some work (rounding over the edges, cutting a groove for the companionway hatch guides to run in, and further easing and refinement of the surfaces), but they are looking great.

Total Time Today: 3 hrs


No comments:
Post a Comment