Sunday, July 28, 2019

Hull & Electric Motor Mount Surfacing


July 28, 2019


I continued work on the aft of the boat today, the old outboard engine well, or aperture through the counter of the boat.  I also continued refining the shape of the mounting surface for the new Torqeedo  Cruise 4.0 fixed pod electric motor.  My first order of business, as is the case most often, was to water-wash the amine blush from the surface of the epoxy that cured without the addition of peel ply.  But first I had to remove the supportive braces I installed on the exterior of the boat's hull in order to support the fiberglass I laid inside the lazarette.  

With the cured epoxy cleaned up, I could now proceed with prepping the surface for more glass and epoxy work (i.e. sanding the areas not protected by peel ply).  I intended to do some work on the electric motor mount surface, so to that end I had to make sure the boat was level from side to side.  I used a 4' level stretched across the aft of the cockpit settees.


I made only slight adjustments in the boat stands to find level.


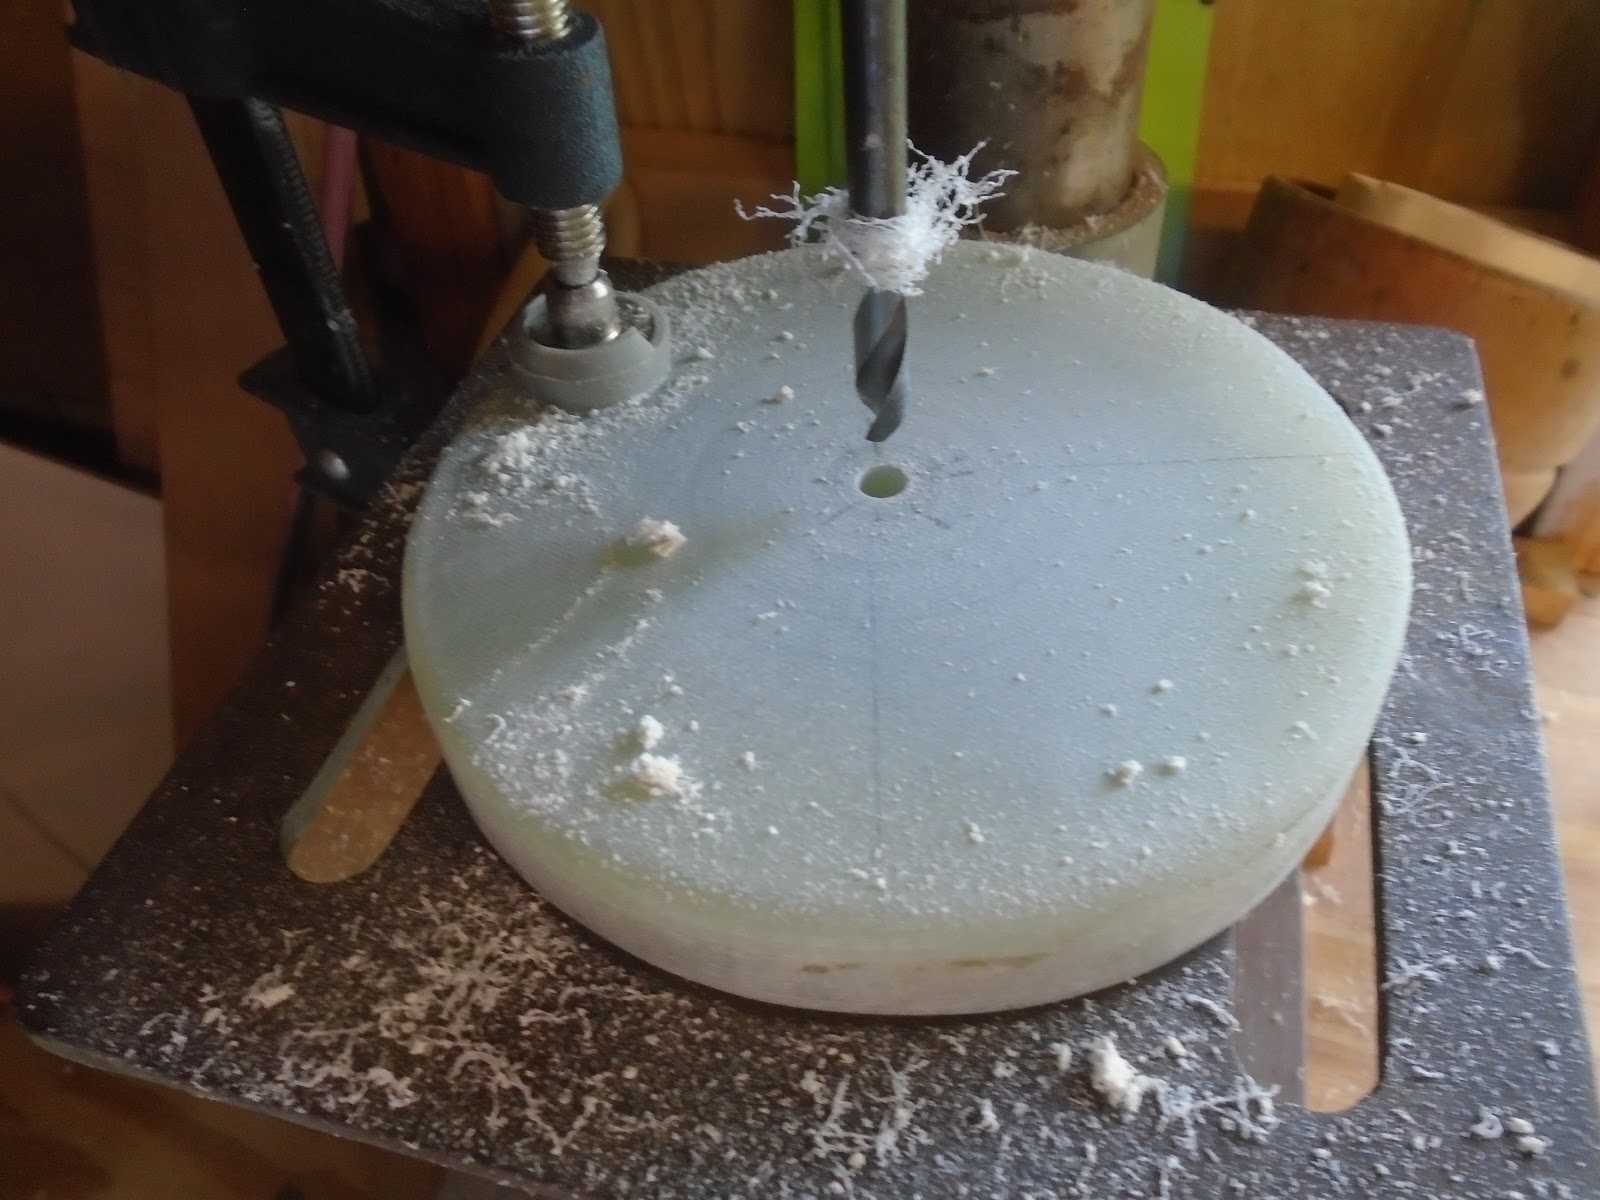
Next, I grabbed the block I fabricated as a female mold of the Torqeedo's mounting block, placed it into its future position, and scribed the upward curve of the counter onto the side of the mold.  Using a cut-off wheel and my 4" angle grinder, I removed this lower portion from the mold.


What I was left with was a lower profile mounting surface on the mold for the Torqeedo mounting block.


I then got to work on further shaping the mold, as well as the recess on the counter of the boat that the mold will be epoxied to.  I used the 1" belt sander and some hand work on the mold itself.


Finally I achieved level from side to side; the forward to aft orientation of the was now good for final install.


With the mold of the mounting block now ready for installation, I turned my attention back to the task of enclosing the old outboard motor well in the lazarette.  There were a couple spots on the opening that I did not support with braces, and sure enough the heavier biaxial and double biaxial cloth I used as the first layering to go over the opening sagged a bit.  So with the 1" belt sander, I removed the most extreme contours of the two spots where sagging occurred.  I did cut through the two layers (essentially three layers of 1708), but had no issue with this since additional layers of glass would rectify this temporary situation.  In fact, I planned to begin to rectify it today.

I cut a 12" x 10.5" square of 6oz cloth to cover the two locations that I broke through with the belt sander.


I first cleaned up the surfaces, inside and out, by vacuuming and then solvent-washing.  Next, I wet the exterior surface of the repair area on the counter of the boat with epoxy resin, and then filled any low spots with thickened epoxy.  I also feathered in the sharp contrast between the original laminate around the perimeter of the old engine well and the new glass laid up yesterday.  I worked the thickened epoxy from the new fiberglass and across original laminate.  This feathering allowed for a smooth transition from old too new.

I then laid the 12" x 10.5" piece of 6oz cloth on the repair area, effectively sealing up the two holes I created with the 1" belt sander by removing the cured fiberglass sag.


Inside the lazarette, I thickened some additional epoxy resin to a loose consistency (think mayonnaise), and very carefully spread that across the old engine well repair area, being sure not to push the thickened epoxy out through the two holes.  I laid peel ply on both the interior and exterior of this work.  I will lay up some a couple more layers of the 35oz double biaxial cloth on the interior to complete the job of enclosing the old outboard engine well.  

The exterior of the hull will take a bit more work to fill and fair the surface to ready it for primer paint, and while this is happening, I will be installing the electric motor mounting surface, filling and fairing it as well.


Total Time Today: 3.5 hrs


Saturday, July 27, 2019

Dry-fitting the Seacocks & Enclosing the Lazarette's Outboard Engine Well


July 27, 2019


I began the day's work with enclosing the boat's outboard engine well, or aperture, located in the lazarette.  Since the owner has elected to go with Torqueedo's Cruise 4.0 fixed pod, the outboard aperture could now be closed back up.  In previous posts I discuss the approach to mounting the fixed pod, and will be creating the substrate to accept the fixed pod's mounting block.  Today, however, I would focus on just enclosing the that large hole in the counter of the Allied 24.

I began by creating some supports to mount on the exterior of the boat to support the heavy fiberglass I would be laying over the interior of the hull.  I used plenty of tape, cardboard, stir sticks (tongue depressors), and tape to build a support system.  On the interior I simply solvent-washed the previously sanded surfaces.  Back over in the shop, using some measurements that I had taken on the boat, I cut a few pieces of fiberglass: one 36" x 30" piece of 1708 biaxial and one 24" x 24" piece of 35oz double biaxial - essentially a double layer of the 1708 (17oz) fiberglass.

I began by enclosing an old thru-hull opening just forward of the engine aperture - this was used to drain water that made it into the lazarette.  The hole happened to be in the recess that I created to accept a fiberglass mold of the fixed pod's mounting block.  I wet the exterior and interior surfaces with epoxy resin, and then filled any voids and depressions with thickened epoxy.  On the exterior I laid a 3" x 3" square of 1708 biaxial cloth over the hole, and then placed a piece of peel ply on that to eliminate the need for sanding prior to additional epoxy work.

I returned to the shop to wet out the large panels of fiberglass cloth.  Using a 6" foam roller and straight epoxy resin, I rolled out and fully saturated the two panels of fiberglass, which were both laid out on plastic sheeting.  I returned to the boat and applied the larger 35oz panel first, and used the foam roller to roll out any trapped air bubbles.  Next, I laid out the larger 36" x 30" panel of 1708 biaxial, again using the foal roller to ensure good adhesion with no trapped air.  I ended up applying a layer of peel ply over this large surface area to reduce water-washing and sanding in preparation for more fiberglass work.


With the old engine aperture repair underway and taken as far as I could today, I turned my attention to the seacocks next.  The fasteners had arrived Friday morning, and so that meant I could dry-fit the seacocks and thru-hull fittings prior to final installation.  I secured the necessary tools and materials for the job and then headed over to the boat.

I started on the starboard side with first orienting the seacock in the proper position to feed a 1" hose through the cutout in the original fiberglass molded settee to then attach to the 90 degree elbow fitting on the seacock itself.  Next, I used a 3/8" drill bit and drilled out the first fastener hole from the interior of the boat.  With that first fastener holed drilled out, I secure the 3/8" bronze machine screw with a nut on the interior.  I followed this pattern, working my way around the seacock base installing all four machine screws and nuts.  


I moved to the port side of the boat and replicated my efforts.


 With both seacock bases secured with their four fasteners, I then removed the nuts and lifted the seacocks off of their backing pads.  


I then stepped outside the boat and grabbed a countersink tool for the drill.


On the exterior now, I removed the bronze fasteners and proceeded to countersink the fastener holes so that the heads of the machine screws could sit below of the surface of the hull.


I started on the starboard side and finished on the port side of the boat.


I then reassembled the seacocks and fasteners, beginning with the starboard seacock.


I also reassembled the port side seacock and fasteners.  With the seacocks mounted back on their backing pads, and the fasteners' heads countersunk and secured with their bronze nuts, I inserted the thru-hull fittings into both port and starboard seacock.  As expected, the mushroom head of the thru-hull, screwed into the seacock as far as possible, sat prod of the hull by roughly 1".   


Back in the shop, I transferred measurements onto the thru-hulls and removed the surplus length of the fitting. 


Back over on the Allied 24, I again mounted the thru-hull fitting, though a shorter version of its previous self, and saw that the fit was good.


Starboard thru-hull fitting above, and port below, dry-fitted and awaiting final installation with SikaFlex 291 LOT bedding compound.


Total Time Today: 5.5 hrs

Friday, July 26, 2019

Sealing Undersides of the New Settee Tops


July 26, 2019


With visiting family members having departed in the afternoon, I stole a quick hour on the boat to seal the undersides of the new settee tops in the cabin.  I flipped the tops over and placed the port settee top on the starboard side and the starboard settee top on the port side.  I then solvent-wiped the underside of both to remove any remaining contaminates.

Using the TotalBoat TotalProtect epoxy barrier coat paint, I then sealed the undersides.  I first cut in around the cleats that support the locker lids with a 2" brush, and also at the forward and aft ends as they were difficult to access with the foam roller. 


The field of the settee tops were easily enough painted out with the 6" foam roller.  The tops of the settees, and what is viewable of the cleats, will be painted out with the finish paint for the cabin.


Total Time Today: 1.25 hrs

Sunday, July 21, 2019

Completing Seacock Backing Pads & Electric Motor Mounting Surface


July 21, 2019


I wanted to move closer to the final installation of the seacocks, but was limited to what I could do today due to needing to allow paint to cure and not having the correct fasteners on hand.  However, I could at least take the job to the point that I could: painting. 

My first step today was to water-wash the amine blush from the surface of the backing pads and surrounding hull.


Next, I used the 1/4" drill bit and completed what would be the hole saw's pilot hole through the boat.


This is a picture of the starboard side of the boat, showing the 1/4" pilot hole.  The new through-hull fittings would be the vicinity of the original fittings, as shown by the new epoxy barrier coat paint I applied to the repaired area.


After both pilot holes were drilled, I outfitted the drill bit with the correct diameter hole saw in order to remove a plug of fiberglass for the new through-hull fittings.  I went slow at first to ensure that I was maintaining a perpendicular approach to the hull's surface.


I drilled out both the starboard and port side for the new through-hull fittings.  The thickness, including the backing pad material, was roughly 1.25".


A view of the starboard backing pad ready for paint.


A view of the port backing pad ready for paint.


Paint on the starboard backing pad.


Paint on the port backing pad.  I will be ordering the correct size fasteners this evening, and in the coming week I will be mounting the new seacocks, completing this job.


To wrap up the evening, I did some fine-tuning on the Torqueedo's mounting surface.  In my previous work session, I applied some thickened epoxy to the interior surface of the mounting block in order to reduce the side-to-side play; the fit was a bit loose for my liking.  So, I water-washed the amine blush and began to fine-tune the fit by a combination of hand-sanding and the use of a spiral saw.  In the end, I achieve a snug fit.  I will be gluing the mounting block into the counter of the boat with epoxy in the coming weeks.  More to come on this job...


Total Time Today: 1.75 hrs

Saturday, July 20, 2019

Seacock Backing Pads & Epoxy-based Primer


July 20, 2019


With a full day to spend on the project, I got straight to work on the backing pads.  In the previous session, I had created the ~5" round discs that would comprise the individual pads: one 1/4" pad and one 1/2" pad glued together with epoxy.  I removed the pads from a protective sheet of plastic, water-washed them to remove amine blush, and then sanded them to remove the squeeze out thickened epoxy.


With the pads now cleaned up, I walked them over to the boat along with a seacock and again tested the fit.


The issue I was running into was that I could not get the drill in a  perpendicular orientation to the backing pad...to drill holes for the threaded bolts (four of them around the base plate of the seacock.  After removing the new meranti settee top, which will soon be permanently installed, I still could not get the drill bit in proper alignment.


I decided to cut a notch out of the original fiberglass molded settee tops in order to achieve the alignment I needed.  I used an oscillating tool for this task.


With both settees modified, which will never be seen once the new settee tops are installed, I was ready to move forward with securing the backing pads to the hull surface.


Before preparing the hull surface I decided to drill out the center of the backing pads with a 1/4" bit - this will be the same diameter of the starter bit for the hole saw.  The hole saw will create the diameter needed for the through-hull fitting.  Having this hole in the backing pads, with them cured to the hull, will allow me to easily continue the 1/4" hole through the boat while maintaining a perpendicular position.  On the outside of the boat's hull, I will use the 1/4" hole to guide the hole saw  on to the hull to cut for the through-hull fitting.  More to come on this.


I used the 1" belt sander to remove the old paint in the area that the backing pads were to be glued down.


I then placed the backing pads where I wanted them to reside, and followed up by solvent-washing the area and applying tape to protect the surrounding surface from epoxy resin.


The next step was to apply resin to the hull's surface and to the backing plates themselves.


With the surfaces wet out with resin, I mixed another batch of resin and this time thickened it with West System's 403 microfibers.  I buttered the backs of the pads, placed them onto the surface of the hull, and then formed a fillet around the circumference of the pads.  I taped the pads just to ensure they didn't move, and left for curing.  I will come back to water-wash and sand prior to continuing with the seacock installations.


With going as far as I could on the seacocks, I moved onto sanding the entirety of the cockpit and deck surfaces that had been previously primed - which was about half of that area.  I was tired of draping cloth over the areas worked with epoxy and anxious to get going with finalizing the paint prep work.  A good layer of primer would give the surface protection from the sun's UV rays, and would also show areas in the surface that needed filling and fairing work.


I vacuumed and solvent-washed the deck, cabin top, cockpit, and poop deck.  Back in the shop, I mixed a large batch of Interlux Interprotect 2000e to help seal the old fiberglass and gelcoat surfaces.


With a foam roller, and after two large batches of the primer paint, I completed nearly all of the surface area I planned to paint.  I was just short of paint to get to the vertical surface of the starboard cockpit seating.  I will go back over the area painted today and sand it to prepare for the filling and fairing required prior to the finish paint primer, Alexseal Finish Primer 442


Total Time Today: 6.75 hrs

Thursday, July 18, 2019

Fabricating Seacocks' Backing Pads


July 18, 2019


I took a bit of time in the early evening to prep the backing plates for further work.  Since the new seacocks arrived, I have been itching to get started on their installation - that may be coming this weekend.  For tonight, I needed to glue up a couple different sizes of G-10 board in an effort to fabricate the backing pads.  I had on hand a 1/4" thick board, and had purchased for this project a 1/2" thick board.  I decided against sealing a bit of 3/4" meranti with epoxy, and instead decided to glue these two separate boards together to form a much more rugged 3/4" backing pad.

On each of the boards, I used an analog for the base of the seacock to create a diameter a bit wider than the seacock base itself.


Using the table saw and a much used cutting blade, I VERY carefully trimmed the rough pads to remove most of the material outside of the diameter marks.


Using the 14" drill press and a small 50-grit cylinder sanding pad, I worked my way around the 4 separate pads and carefully removed material down to the diameter mark.  You can see that I had a shop hose clamped into place to take the fiberglass coming off of the sanding cylinder.


I set the pairs of backing pads on the table saw, and moved on to fine tuning their shapes.  I grabbed the 5" ROB sander and a couple 80-grit pads to ease the top of the 1/4" pads and the bottoms of the 1/2" pads.  I wanted to ease the horizontal to vertical transitions, with the 1/4" pad being on top and the 1/2" pad on the bottom and touching the hull of the boat.  I also sanded the flat surfaces to prepare a good mechanical bonding surface.


With the sanding completed, I set one of the seacocks on a backing pad to get a sense of the final product.


Next step was to glue up the 1/4" and 1/2" pad pairs.  I thoroughly wiped down the pads with solvent to remove any remaining sanding debris, and set them on a sheet of plastic to protect the table from eventual epoxy.  I then wet out the top of the 1/2" pad and the bottom of the 1/4" pad, and thickened the remaining resin with 406 colloidal silica.


I spread the colloidal silica onto the surfaces and firmly pressed them together, working them back and forth and then aligning scribe marks on each of the pairs.  With the balance of the thickened epoxy, I spread it into any surface imperfections around the circumference of the backing pads.  In the coming days, I will sand and refine any wayward cured resin.  


With the few minutes I had left, I cut-off the extended portion of fiberglass on the Torqueedo Cruise pod drive mounting block.  This "block" will be glassed into the overhang just aft of the rudder, and will serve to accept the pod drive for a secure mounting.


Total Time Today: 1.75 hrs

July 29, 2020 The day had arrived!  Time to apply the name of the vessel...S/V Sea Hagg, hailing out of Key Largo (there's on...