April 25, 2019
I was anxious to get started on the sail drive installation, needing to make hull modifications ahead of the painting process both exterior and interior. The fiberglass work is coming along well across the entirety of the boat, and with the exception of the collision/chain locker bulkhead, the sail drive modification was the last remaining chore. The owner elected to "go green" with the selection of the Torqeedo Cruise 4.0 pod drive. Equivalent to an 8hp outboard gasoline engine, the Cruise 4.0 has a running time (range) of nearly 10 hours at 2.7 knots and over an hour at 6 knots. Perfect for getting the Allied on and off the dock or mooring ball!
I started by checking that the boat was level from side to side, sitting on her keel. My intention was to build a jig , and secure it to her counter, or overhang, and then use a router to create a depression to accept the mounting plate of the Cruise 4.0 pod drive.

Next, I worked to remove the lazarette thru-hull installed to allow any water that lapped up into the outboard well to then drain out.

I removed the mushroom head with an angle grinder and then used a specialized step wrench to remove the threaded fitting.

Back in the shop, and using the Cruise 4.0 mounting plate, I created a template that would be used as a jig for the installation. I used the template to drill fastener holes, and then tapped those holes for 1/4" threaded bolts.

With the bolt holes drilled and tapped, I installed the template and reviewed the mount angle for further adjustments.

I wanted to avoid a perfectly horizontal mount, or in a parallel plane as the water line. Rather, I wanted a slightly tilted angle, with the forward end angled higher than the aft end of the template - and ultimately the mounting plate. With the template / jig in place I began to reconsider my plans for creating the depression within the overhang that the pod drive mounting plate would rest. There was simply no good way for me to work with the jig as it was. So, I modified it in order to preserve the dimensions as it hung in place. I hot-glued a couple blocks of wood to either side the centerline, and then hot-glued a couple strips of doorskin (thin, cheap plywood) to those blocks of wood and such that they were just touching the hull's overhang.

The photo below shows the two strips of doorskin (vertical orientation) with two 1"x4" blocks in line, with bevels cut to mirror the angle of the hull's overhang.
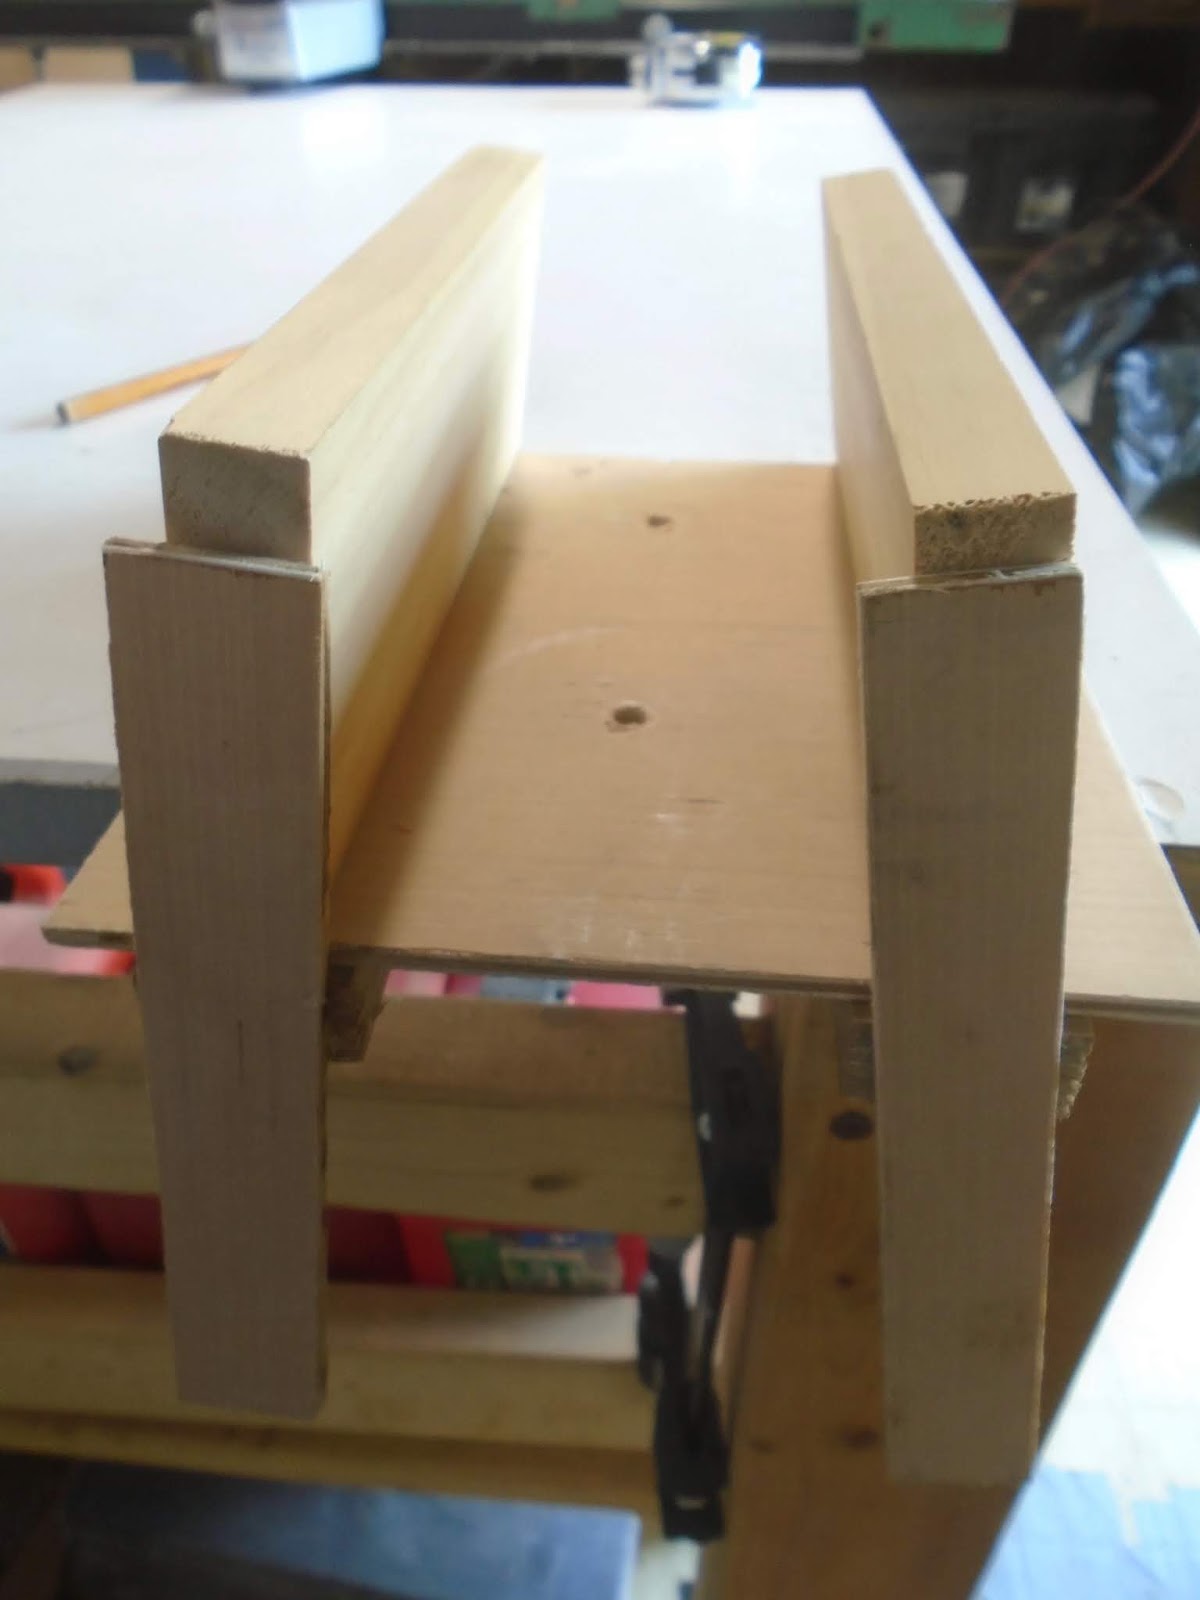
I then cut the 1"x4" blocks down to roughly 3/4 of an inch on the aft ends and narrowing down to 3/8 of an inch on the forward ends. My altered approach would be to hot-glue these shallow blocks to the hull's overhang, using them as a router sled to then remove material from the hull's laminate. Setting the router deep enough to remove more material forward, and as I slide the router aft, the increasing height of the sleds would then prevent less and less material from being removed. The effect, when complete, would present a mounting angle, compared to the water line plane, that would angle down moving from forward to aft.

I checked the dimension of the space I was about to route out (between the two sleds' inside edges. The Cruise 4.0 mounting plate (shown above and below) would rest within this space. Satisfied with the dimensions and plan of attack, I moved back over to the boat.

I first replicated the dimensions of the area to route out, and marked them onto the hull. From the previously marked centerline, I made parallel lines 2" to starboard and 2" to port from that centerline. The depression that the mounting plate would be nestled within would begin by being a 4" wide and roughly 8.5" long depression.

The angles of the sleds produced fine results for the initial cuts. There would be some further clean up and fine-tuning, but for the first scratch at it, I couldn't have been more satisfied.

I will build up the aft end slightly to further produce the angle of attack that I am going for - sloping down going from forward to aft. More to come.

Total Time Today: 3 hrs - it was an 7.5 hr day, but there was a lot of head scratching and trialing :)


No comments:
Post a Comment