September 15, 2019
After taking care of some domestic duties and errands in the morning, I was able to get going on the Allied 24 just after lunch. With inclement bands of weather blowing through from tropical storm Humberto, I was open to the possibility of focusing on work within the wood shop - brightwork, furthering the battery compartment build, etc. However, after a couple hours in the shop, and after finishing what I was working on, I decided to head back out to the Allied 24 and take advantage of the partly cloudy and breezy conditions.
Before I got to the boat, I took out the 12"-wide teak board for the port coaming, as well as the original port coaming board itself. The original coaming board resembled what one might imagine a coaming board of 50+ years might look like, plus it had that aesthetics-challenged Cetol product applied to it.

I got to work removing the coaming block - a transition piece from the forward end of the coaming block to the cabin sides. I removed the bungs with utility knife, and then backed the screws out one by one. The screws on the port side, three newer stainless steel wood screws along with what I imagined was one of the original bronze wood screws, were backed out without a fuss. The starboard coaming block and coaming board was assembled with three bronze screws, suggesting that the port coaming, as a result of the stainless screws, had some work done to it in prior years.

With the coaming block removed, I used a straight razor to scrap off the bedding compound used to help attach, adhere, and eliminate water from seeping between the board and the fiberglass molded coaming.

With the original port coaming board prepped, I went ahead took some width dimensions from it, measuring several places across the board. All of them came back at a bit less than 3/4". The natural weathering over time and general maintenance on the coaming boards, likely reduced the thickness from 3/4" to something between that and 5/8". I noted the planned dimension.

Looking over the new teak stock, I laid out the original port coaming on the portion of the board that would serve best to support strength and appearance. I clamped the original coaming board to the teak stock to remove the curve imparted to the board by it being mounted in the boat.
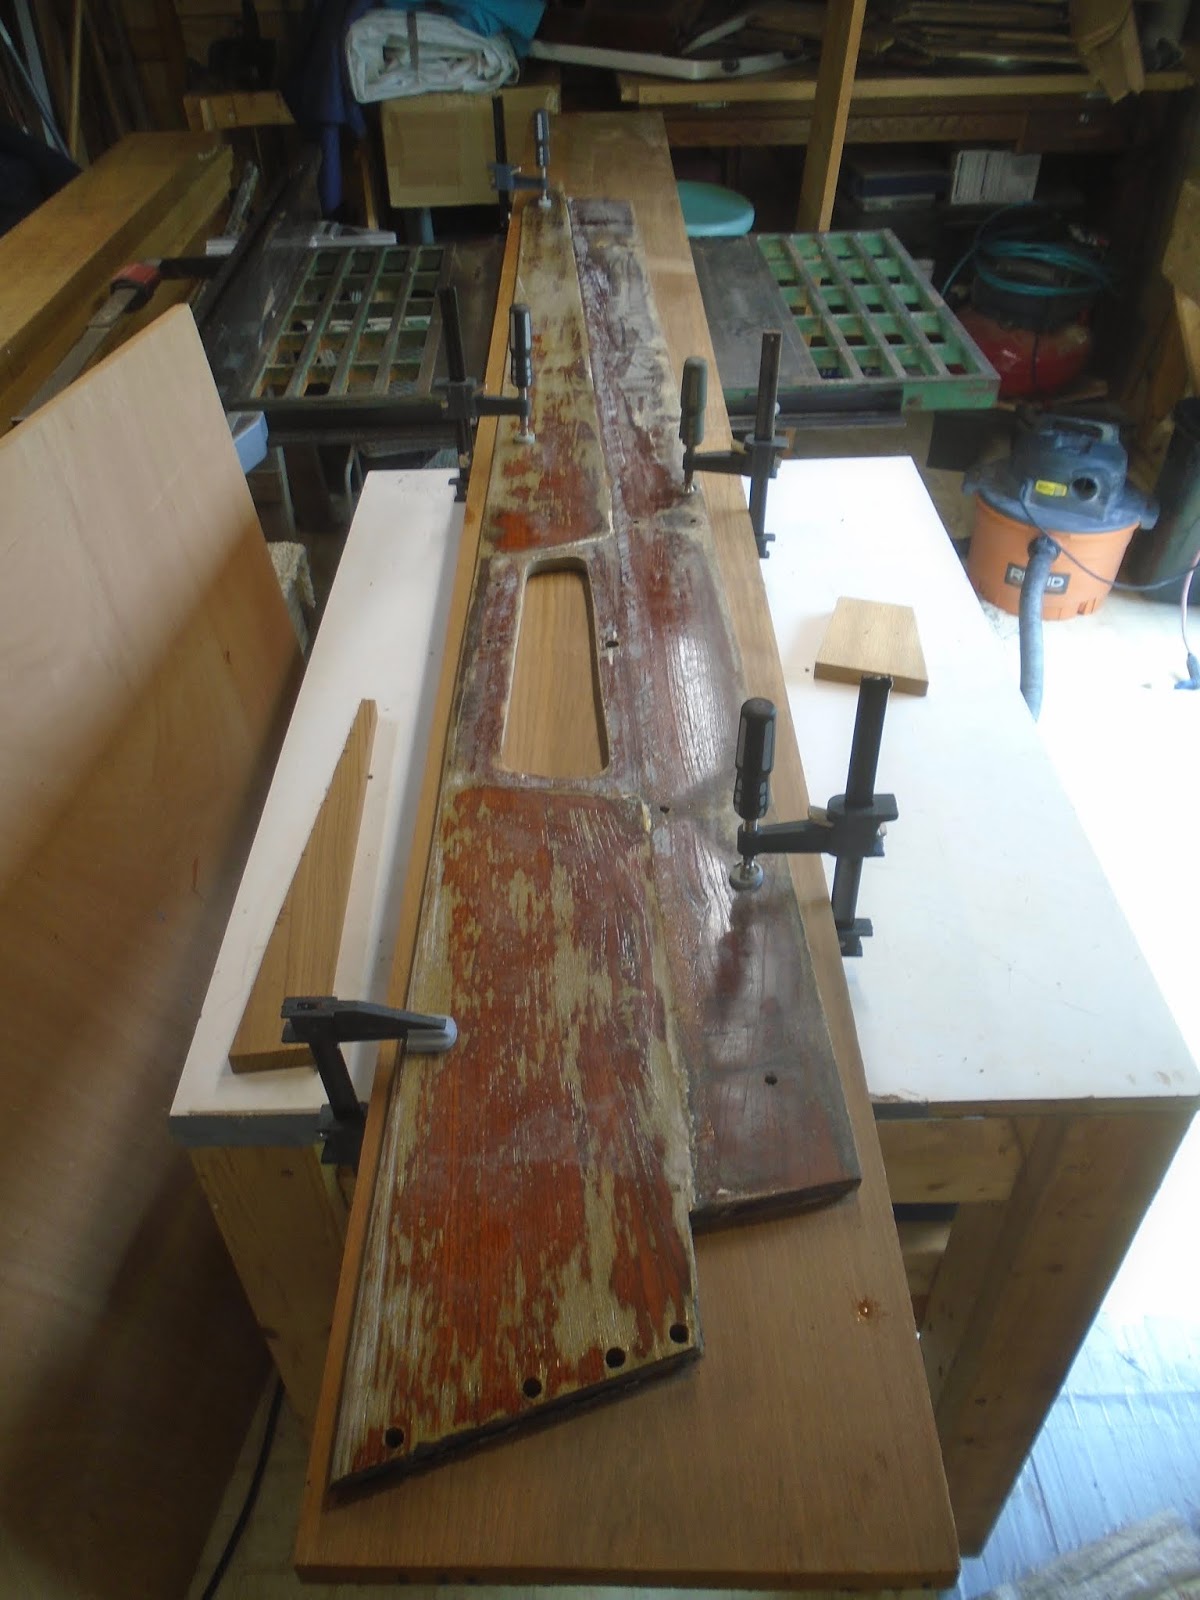
I then simply used the original board as a template, and transferred it onto the new teak.

With a circular saw, I cut off the roughly 2' of teak that ran longer than what the new coaming board would need and set it to the side. I changed directions at this point, choosing to not continue fabricating the new teak boards. I made the decision to have the boat's deck and cockpit faired and primed before moving on with the fabricating and iterative process of fitting the new brightwork. Which means that fabricating the new brightwork is just around the corner. I set the two boards to soon become the coamings to the side and found other things to get into.

The battery compartment (box / landing platform) will be evolving over the next couple weeks, with the thought of building it so that the owner can get easy access to the battery if needed - a difficult space to access may push out maintenance tasks. For today, I wanted to get a few cleats glued in place. The top panel of the battery compartment would improve the fit between itself and the side panels through the installation of a couple cleats to its underbelly.

I used some meranti of the same dimension as the side panels as analogs for the spacing of the cleat. After placing the components required for this task in position, I tapped off the surfaces I wanted to protect from epoxy squeeze out. With that done, I wiped the surfaces to be glued together with acetone, mixed some epoxy and wet out those same surfaces.

I then mixed the balance of the epoxy resin with colloidal silica to thicken it, and spread that onto the cleats. I placed them and pushed them down to get the squeeze out I was looking for. I then carefully removed the clamps and analog side panels, and transferred the clamps to the cleats themselves. I carefully cleaned up the squeeze out and then removed the tape.

The other cleat I wanted to install for the battery compartment was one to support the top panel, on its aft end. In the previous work session, while I had the battery compartment assembled, I scribed a line on the forward (interior) face of the cockpit well, just beneath the top panel. I dimensioned a piece of stock mahogany, and with thickened epoxy, glued it to the surface and supported by tape. These few tasks concluded, I moved out to the boat to get some work done there.

The entirety of the boat is now primed - exception is the lazarette, and that is due to some further glass work required and possible shelf installation. The lazarette was not my focus, so I moved forward with my plans for the boat. I wanted to sand the entirety of the deck and cockpit well in order to spot-fill and fair the small voids in the laminate. The priming process made identifying these voids more obvious.

By hand, I moved across the boat with a few hook-n-loop 80-grit sanding discs, starting at the bow and moving aft. At this point in the restoration process, I nearly always choose to sand by hand for the ease of controlling the removal of material.

Once I finished the sanding, I came back and thoroughly vacuumed the surfaces and then wiped them clean with acetone to remove the residual sanding dust and debris. The final task for the day would be to apply fairing compound. I choose the TotalBoat TotalFair product. This 1:1 epoxy-based fairing product is a quick and easy application. It states that it can be sanded within three hours, but I would need to leave this for another day. With the finish paint and primer ordered and enroute, I will soon be applying the finish primer...and then fabricating brightwork!

Total Time Today: 5 hrs


No comments:
Post a Comment