May 11, 2019
A milestone day - paint in the lockers and bilge! In order to move forward with the final installation of the new v-berth platform tops, I really needed to get the lockers painted, and would have been done sooner except for the recently installed small bulkheads at the aft of the existing fiberglass v-berth and the supportive cleats on the primary bulkheads to support the new platform tops. Well, with those two lingering tasks completed last week, I was now ready to paint the lockers.
Last week I thoroughly vacuumed and solvent-washed the hull surface inside the lockers, but I repeated the same exercise today to ensure that I retrieved any newly found debris.

With the prep work complete, I returned to the shop and mixed the two-part epoxy paint that I'd using to paint the lockers and bilge surfaces. I chose an epoxy barrier coat paint that stands up exceptionally well to oil, grime, and even water intrusion. This paint is designed to be applied above and below the waterline, as a barrier coat prior to bottom paint. The TotalBoat TotalProtect epoxy primer and barrier coat product will perform well in this environment.

I got started in the forward center locker, and then made my way aft by first painting the port side locker and then the starboard locker. As can be seen on the photos, I also painted out the small cubbies aft of the v-berth platform and forward of the primary bulkheads. With the new v-berth platform top installed, as well as some netting to secure stowed items, these cubbies will serve as useful storage for items regular called in to service.

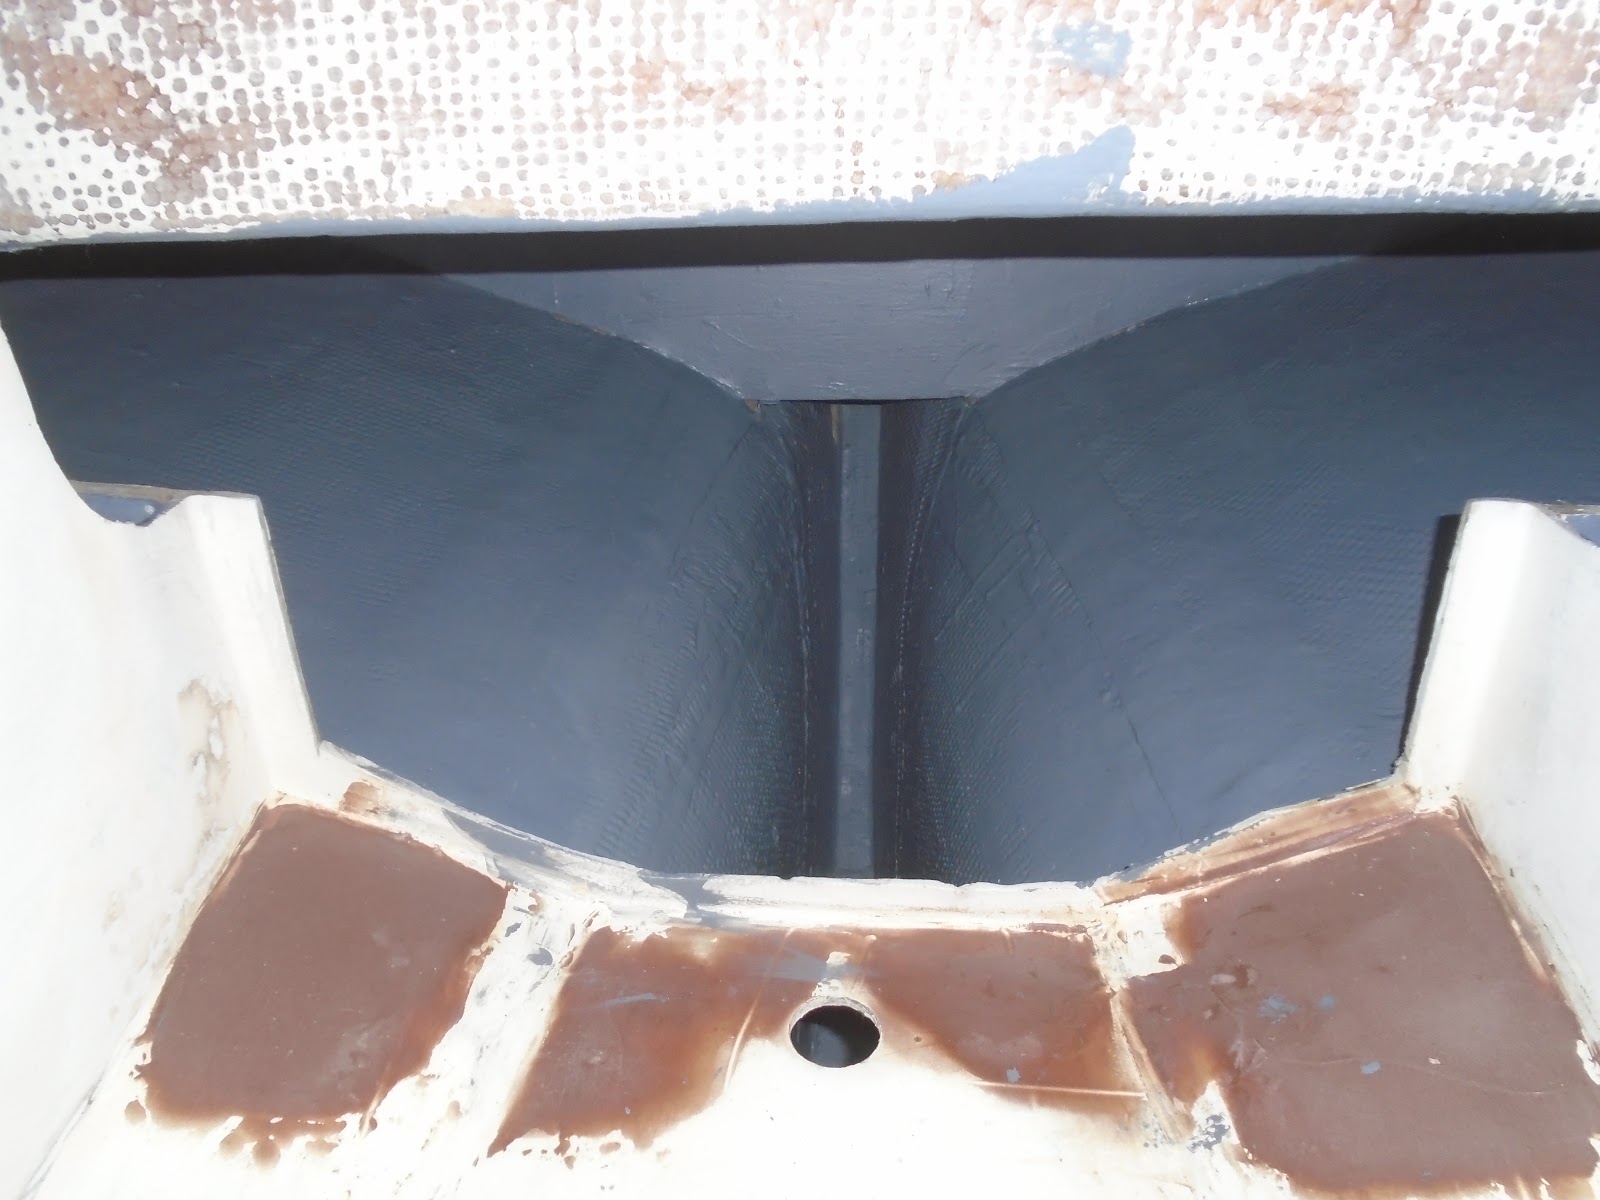
I dropped down to also paint the small void below the old head platform - the two thru-hull patches can also be seen (with sanding and fairing work yet to be done on them both). I new top will be installed here, with a hatch to access and clean the space below.

I continued moving aft in the boat, and painted out the primary access to the bilge. The support structures proved a bit of a nuisance to brush and roller, but I valiantly completed the mission.

Next, I moved up to paint out the lockers beneath the cabin settees. I started to port, and then moved over to the starboard settee. I left a roughly 7" x 7" square in the inboard-aft portion of the locker for future installation of new seacocks to handle the cockpit and side deck drains.

With the lockers painted, I then moved to the portion of the hull surface just aft of the saloon settees and back to the athwart ship bulkhead spanning underneath the midpoint of the cockpit well. the pictures above and below show the painted surfaces.

I also painted the turn of the bilge and down into the bilge itself (shown below). In all, I applied three coats to all surfaces described in the text above. I painted continuously, since by the time I completed one coat, the paint had tacked to the point that it was ready to overcoat with the second coat, and finally the third coat.
With the painting finished for the day, I moved outside the boat to complete the patching work on the old thru-hulls that I had removed. I started forward, on the starboard side of the boat. This thru-hull patch required another layer of 1708 biaxial cloth since my timing in the first attempt was a bit tardy and the epoxy kicked to the point that I could not apply subsequent layers of 1708 cloth. So, I started with a water-wash of the cured epoxy, and the towel dried the surface.

I moved around the boat, removing the peel ply that I had applied to the cured patches consisting of multiple layers of 1708 biaxial cloth.

It wasn't necessary, as was the case with the forward starboard patch, to sand the balance of the cured patches since I used peel ply to remove the amine blush (wax), but I did do a light sanding with 80-grit discs on the small 5" DA sander.

I quickly sanded all four of the cured patches, but spent more time on the forward starboard patch since another layer of cloth would be applied today.

To that end, I made a template of the required layer of 1708 biaxial and then removed it from the material I had in the shop. I returned to the boat and wiped the surfaces within each patch with solvent to clean them prior to epoxy work. With everything prepped, I mixed a batch of epoxy resin and wet out the forward starboard final layer of biaxial, and wet out the surfaces on the boat themselves with the balance of the leftover neat resin.

I returned to the shop and mixed a batch of thickened epoxy resin - thickened with 406 colloidal silica and 407 low-density filler - and prepared to take it to the boat. I took the now wet final layer of cloth to be applied to the forward starboard patch, and the thickened epoxy, over to the boat. I set the final patch in place, and with a large trowel applied the thickened epoxy over the patch, filling the weave and the balance of depressions around the patch area.

I then moved aft on the starboard side and applied thickened epoxy to this thru-hull patch.

I made a quick trip back to the shop to mix another batch of thickened epoxy, and returned to the boat to apply the fairing compound to the forward port thru-hull patch.

Finally, I moved aft on the port side to complete the fairing of the thru-hull patches. In the coming days, I will water-wash the cured fairing compound (thickened epoxy), and sand the surface to fair. A coat of epoxy barrier paint will be applied over the patched and faired old thru-hull locations, prepping it for bottom paint in the future.

Total Time Today: 5.25 hrs


No comments:
Post a Comment